
Kyle Haskett, PE
Associate
Kyle received both his Bachelor of Science in Architectural Engineering and Master of Science in Civil Engineering-Structural Emphasis from the University of Oklahoma. He is…
View Profile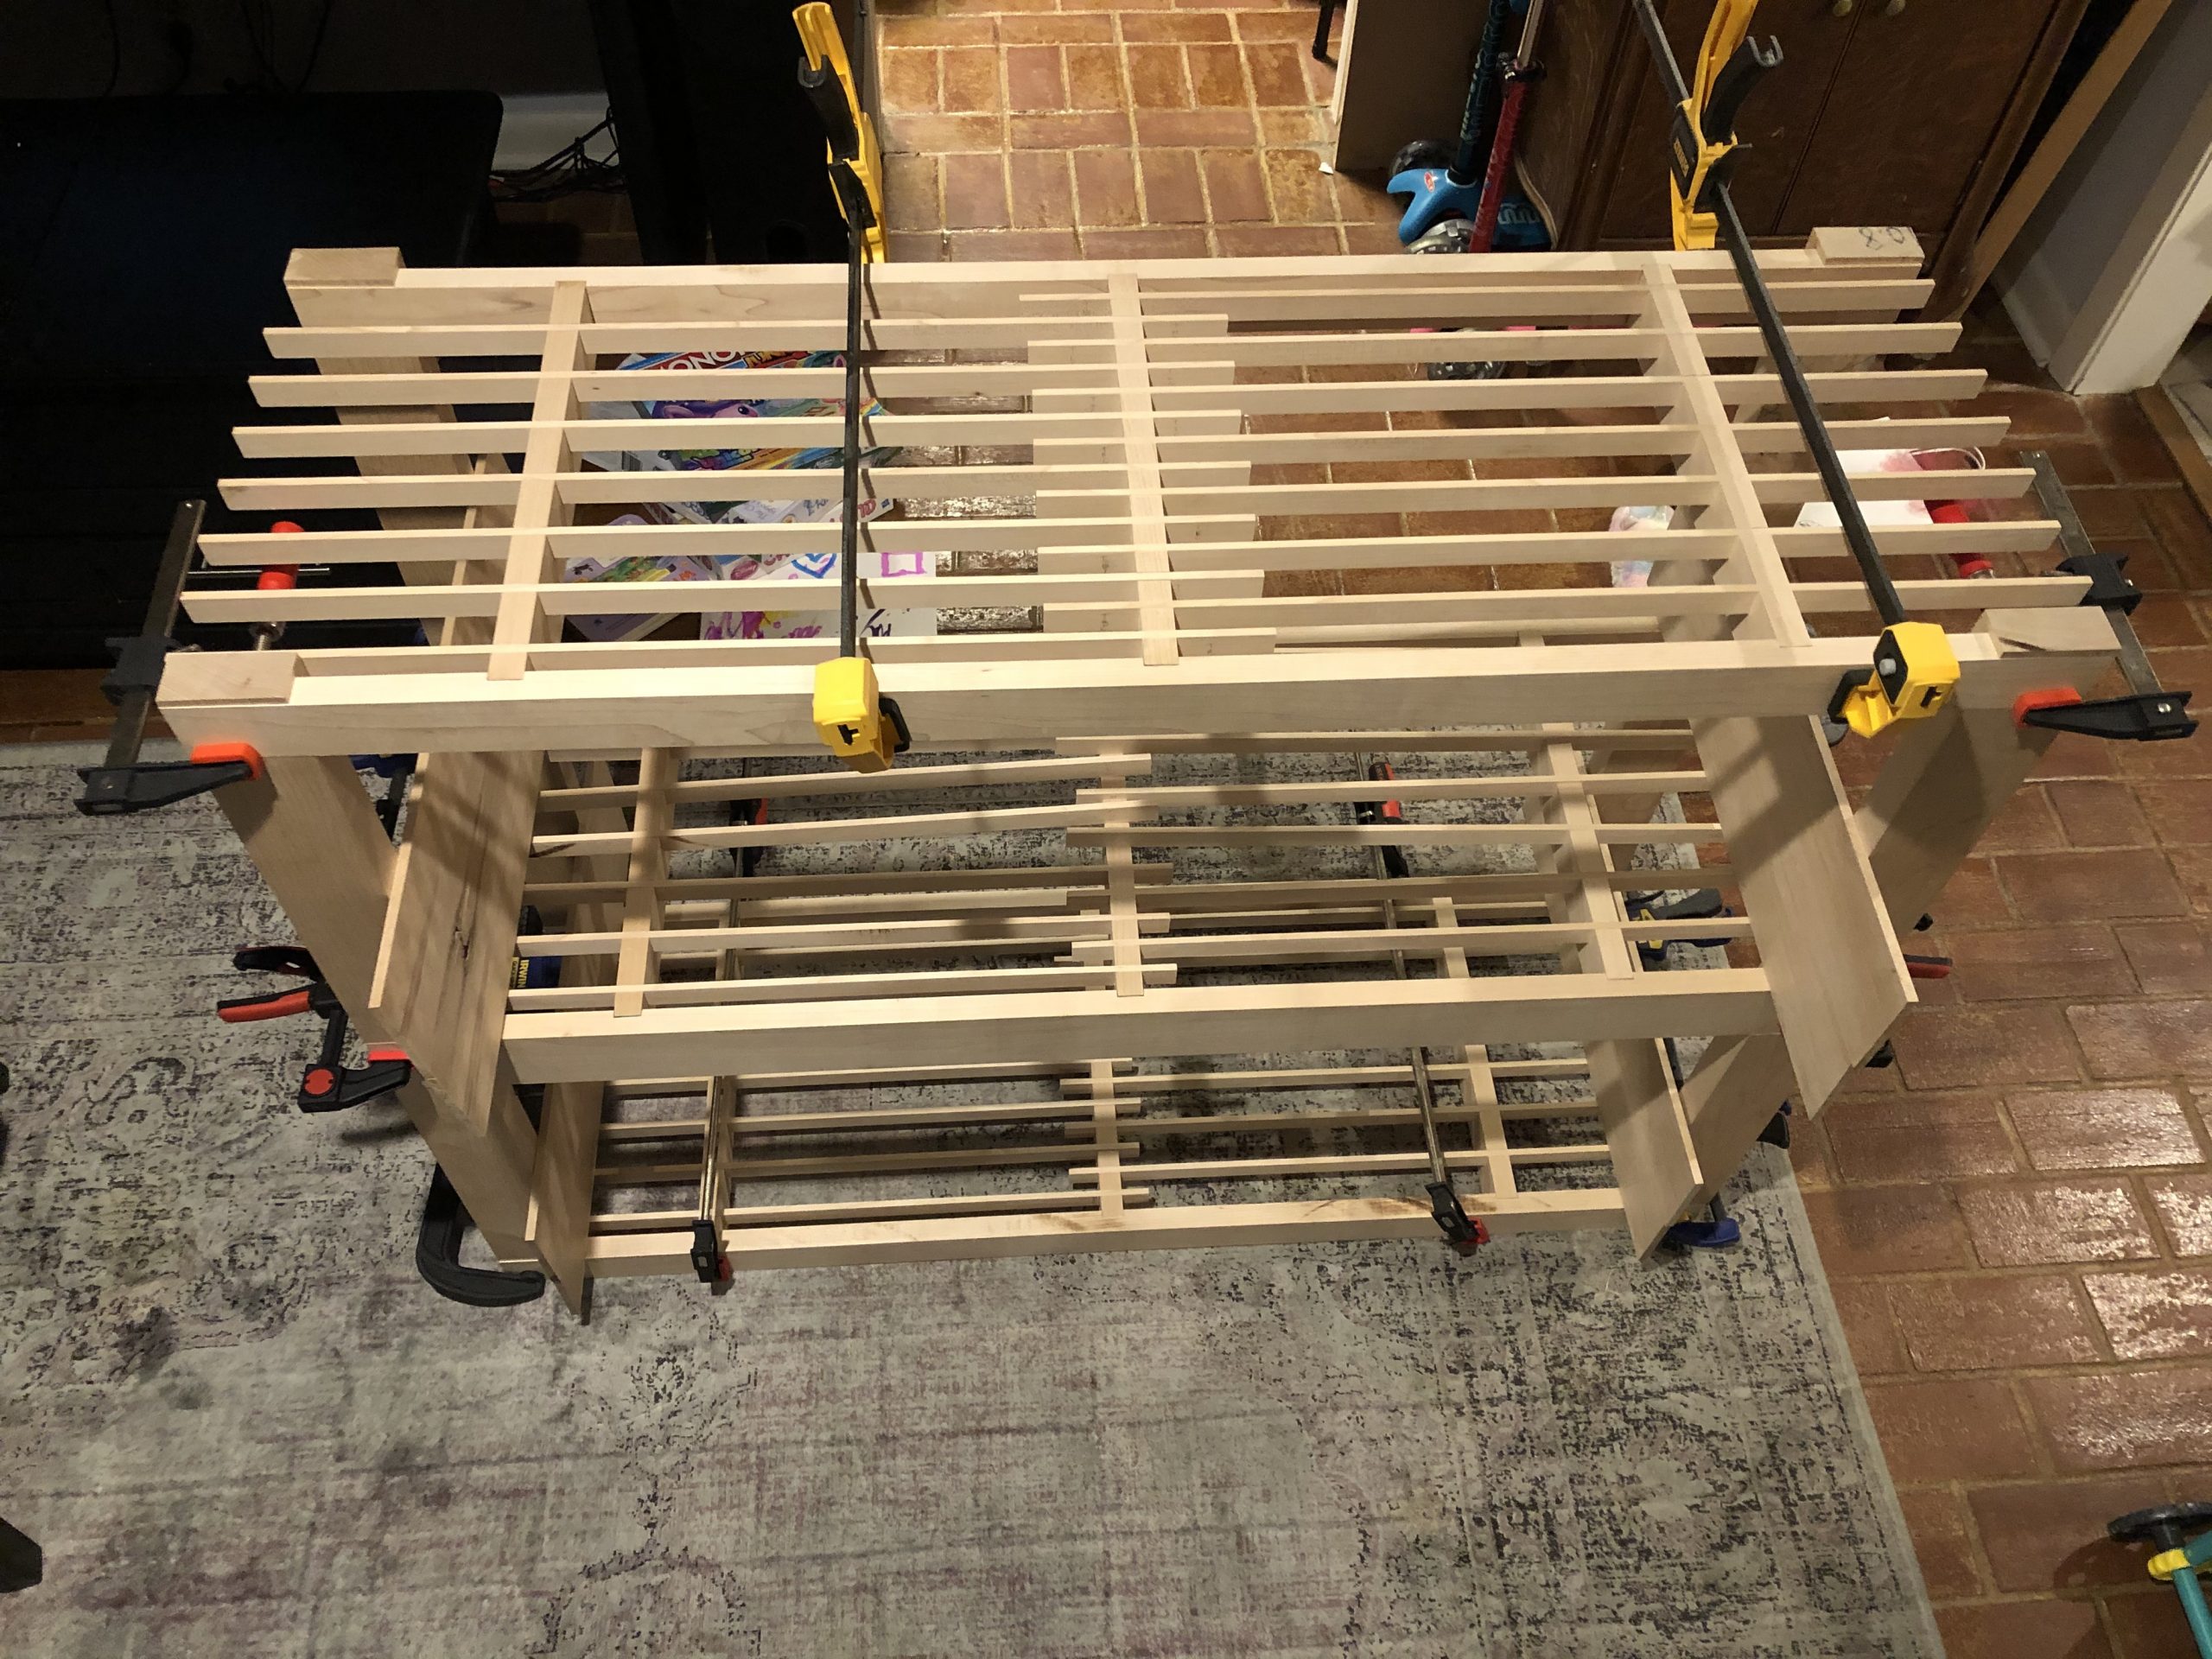
Several years ago, when I was studying to take my licensing exam, I decided to blow off some steam and one thing led to another. I ended up buying a record player, because…I thought they were cool. Anyway, I now had the dilemma of what to do with it. Luckily, I have a family who loves music, so starting a record collection was easy. But where was I going to put the records or the record player? I started looking online for tables I could buy, but I didn’t really like any and couldn’t afford the ones I liked.
Enter the DIY Engineer!
As I am sure most engineers have said, “I could build that, no problem!”
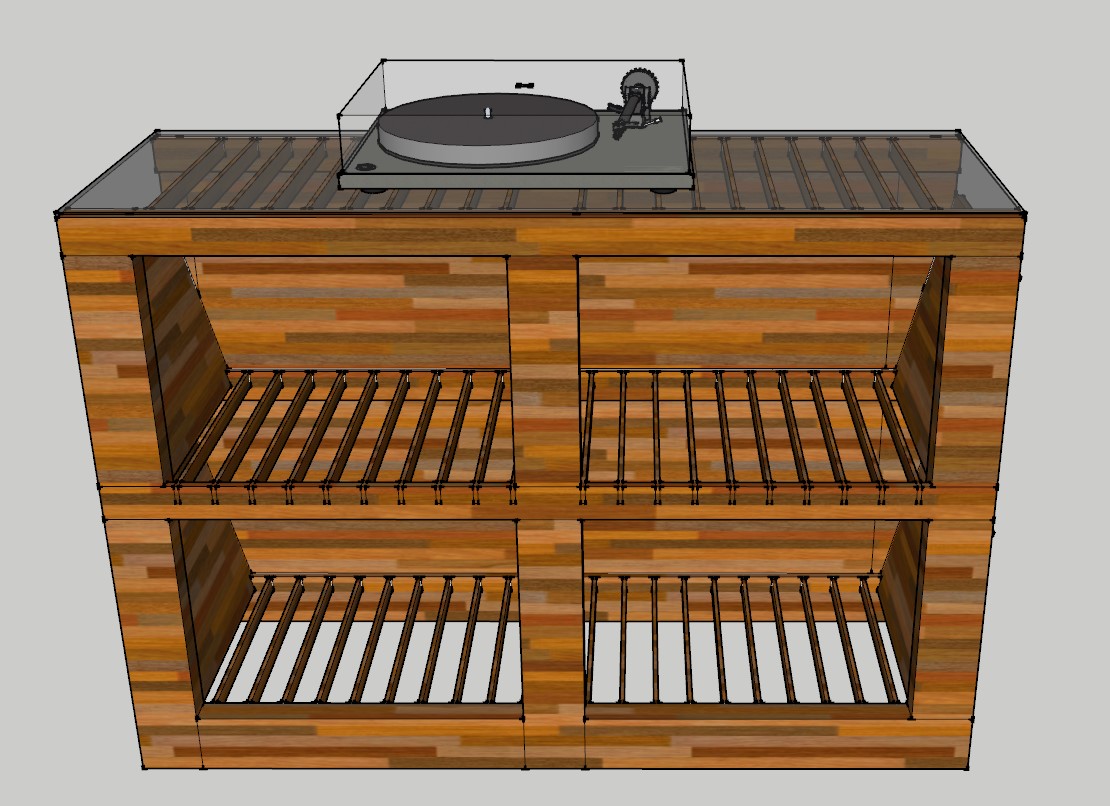
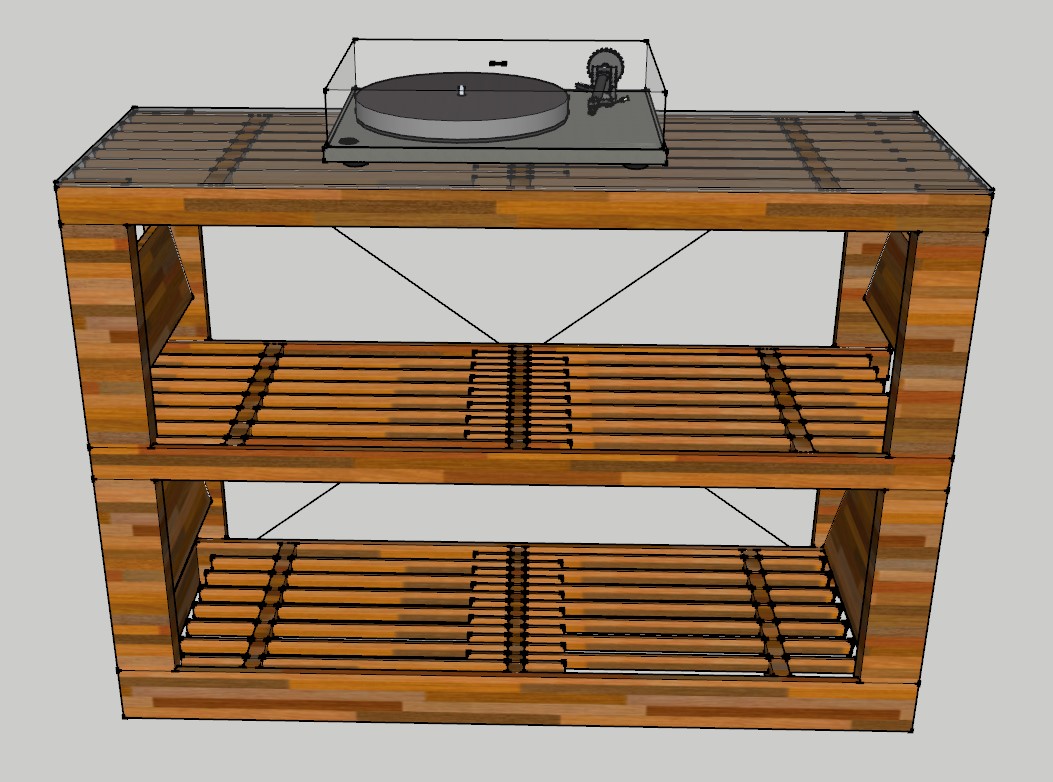
I first set out to design a record stand with some free modeling software. After a few hours of fiddling around, I felt like I had a pretty cool record stand.
But you know who is also pretty good at designing stuff? My architect wife.
Enter the Architect
“It looks really bulky, does the back have to be solid?” she questioned.
“Well how else am I supposed to handle the potential racking caused by a lateral force!?” I responded, referring to how it might lean or tilt if pushed.
“Well, is there no other way? Can you at least cut some of it out? And what about the middle post? Is that really necessary?”
Cut me to the quick! Trust an Architect to point out when you’re being a little too conservative. Fine! I thought about all of the constructive comments from my beautiful wife. I realized she was right, there were better ways of achieving my design and increasing the visual impact.
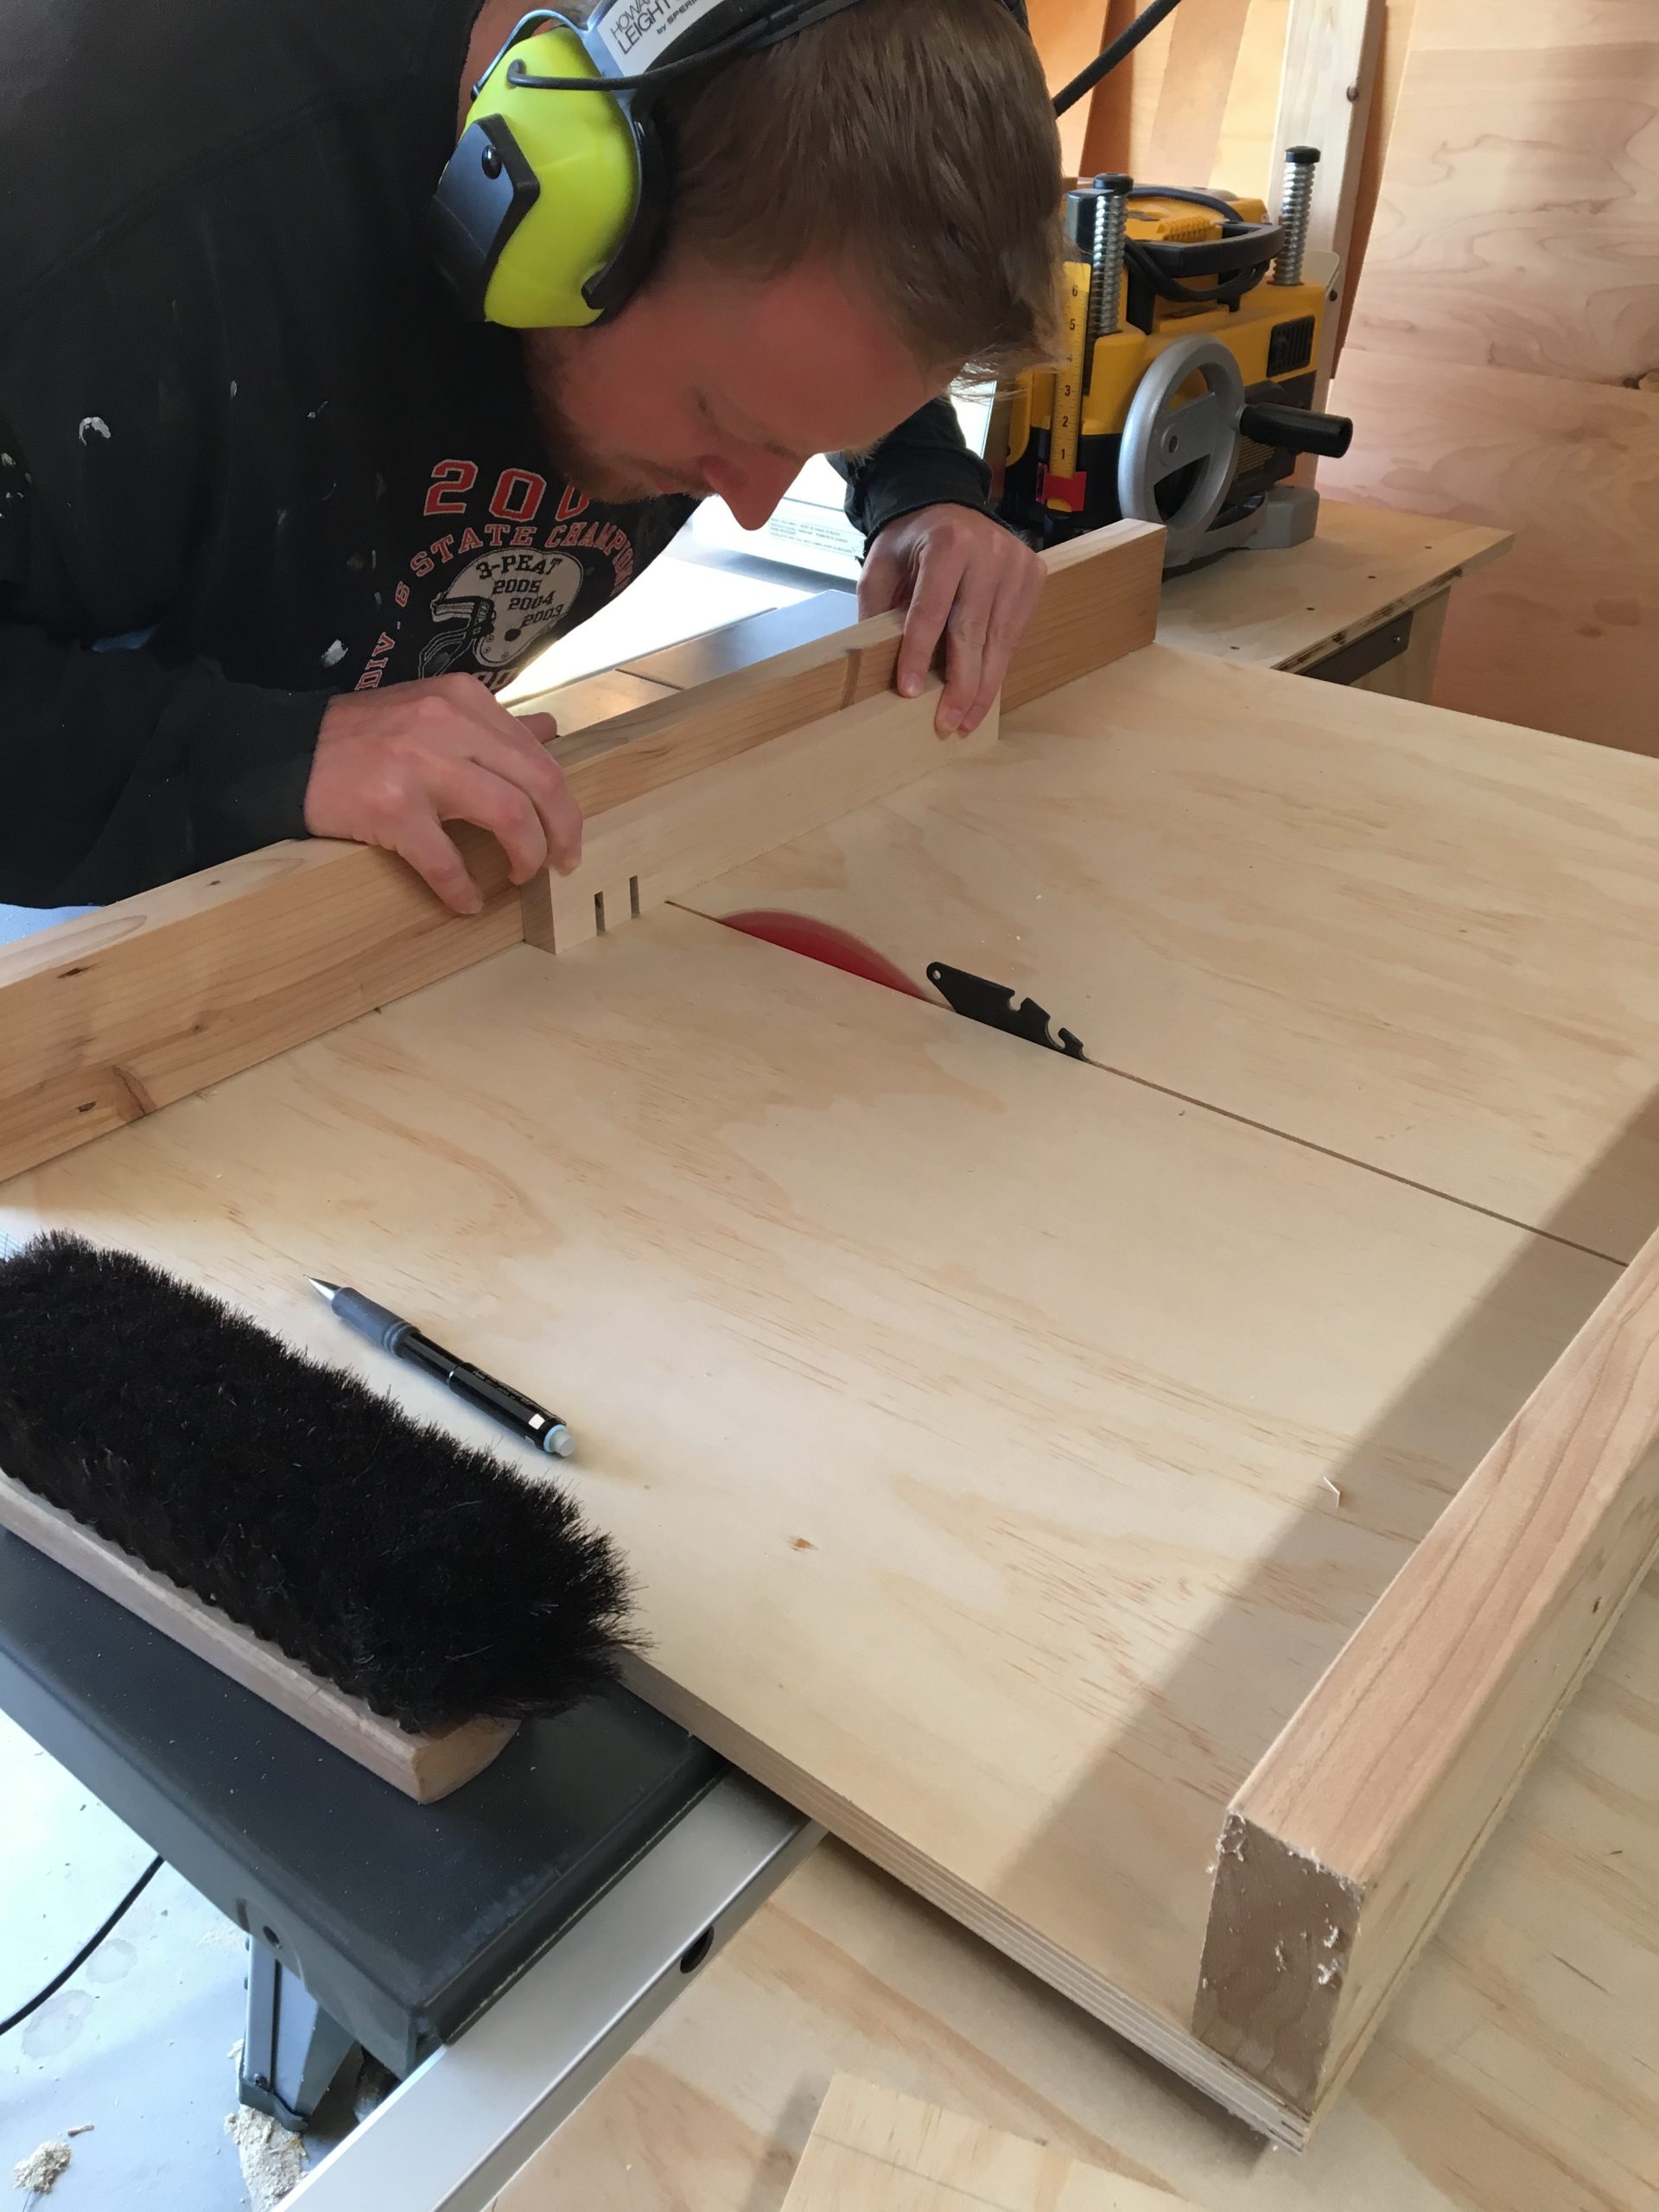
I took her advice and went back to the drawing board, coming back with a sleeker, more open design - and taking care of the lateral forces with cable x-bracing! As an additional challenge, I designed this to be built without any mechanical connectors, no nails, no screws, only wood glue and joints.
Final Model Design
Next step – Run the numbers
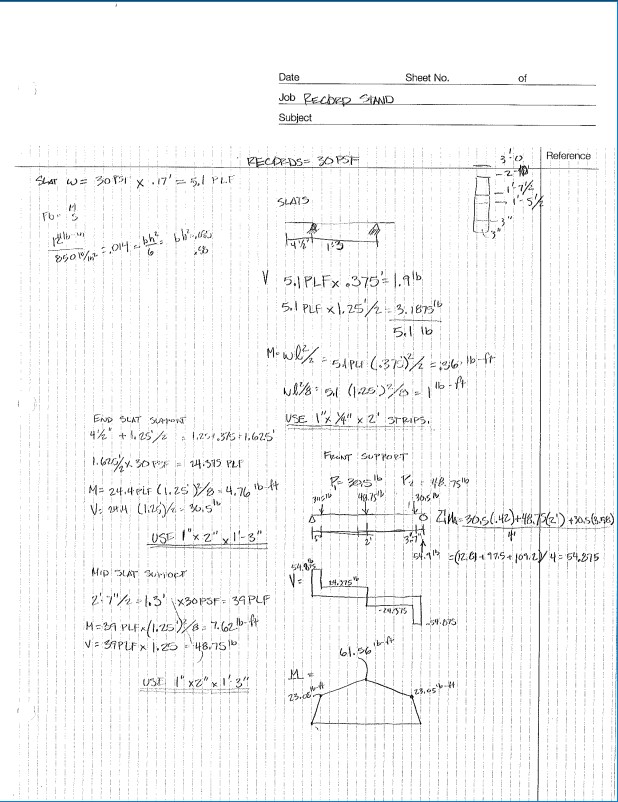
As any good structural engineer would do, I started wondering, “how heavy are records anyway?” After grabbing a 1 foot square box and stuffing as many records in it as I could, I picked it up and discovered they weigh much more than I thought. “Well now I have to weigh them to settle my curiosity,” I thought. Turns out, stacks of records weigh around 30 pounds per square foot!
Then I thought, “Oh no, what if my member sizes are too small and my record stand crumbles like toothpicks?”
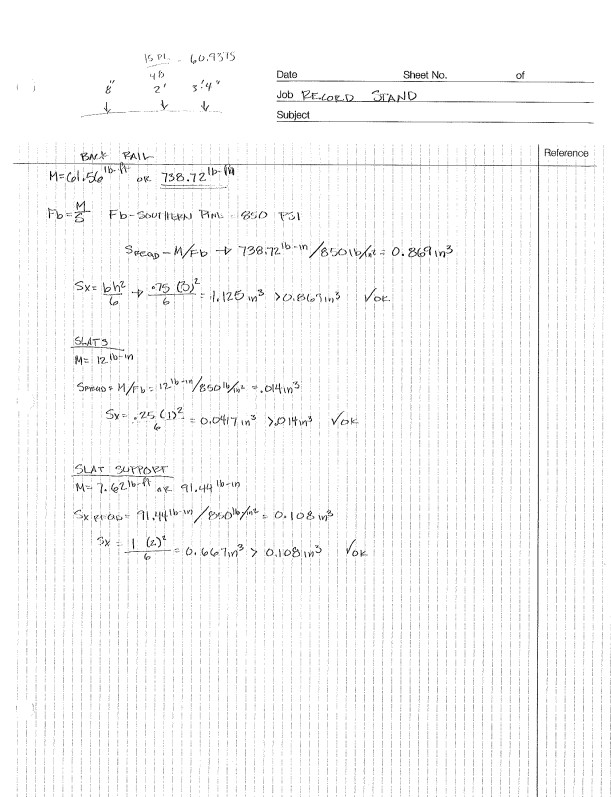
Bring on the pencil and paper. Yep, I ran the numbers. They are no signed and sealed documents, more like scratch paper calcs, but still. And lucky I did because I found that indeed my middle rail was, in fact, too small for the full weight of records. Easy fix! Switch the ground supported 3 inch member with the middle 2 inch rail. With my calculations satisfied, it was time to buy the lumber.
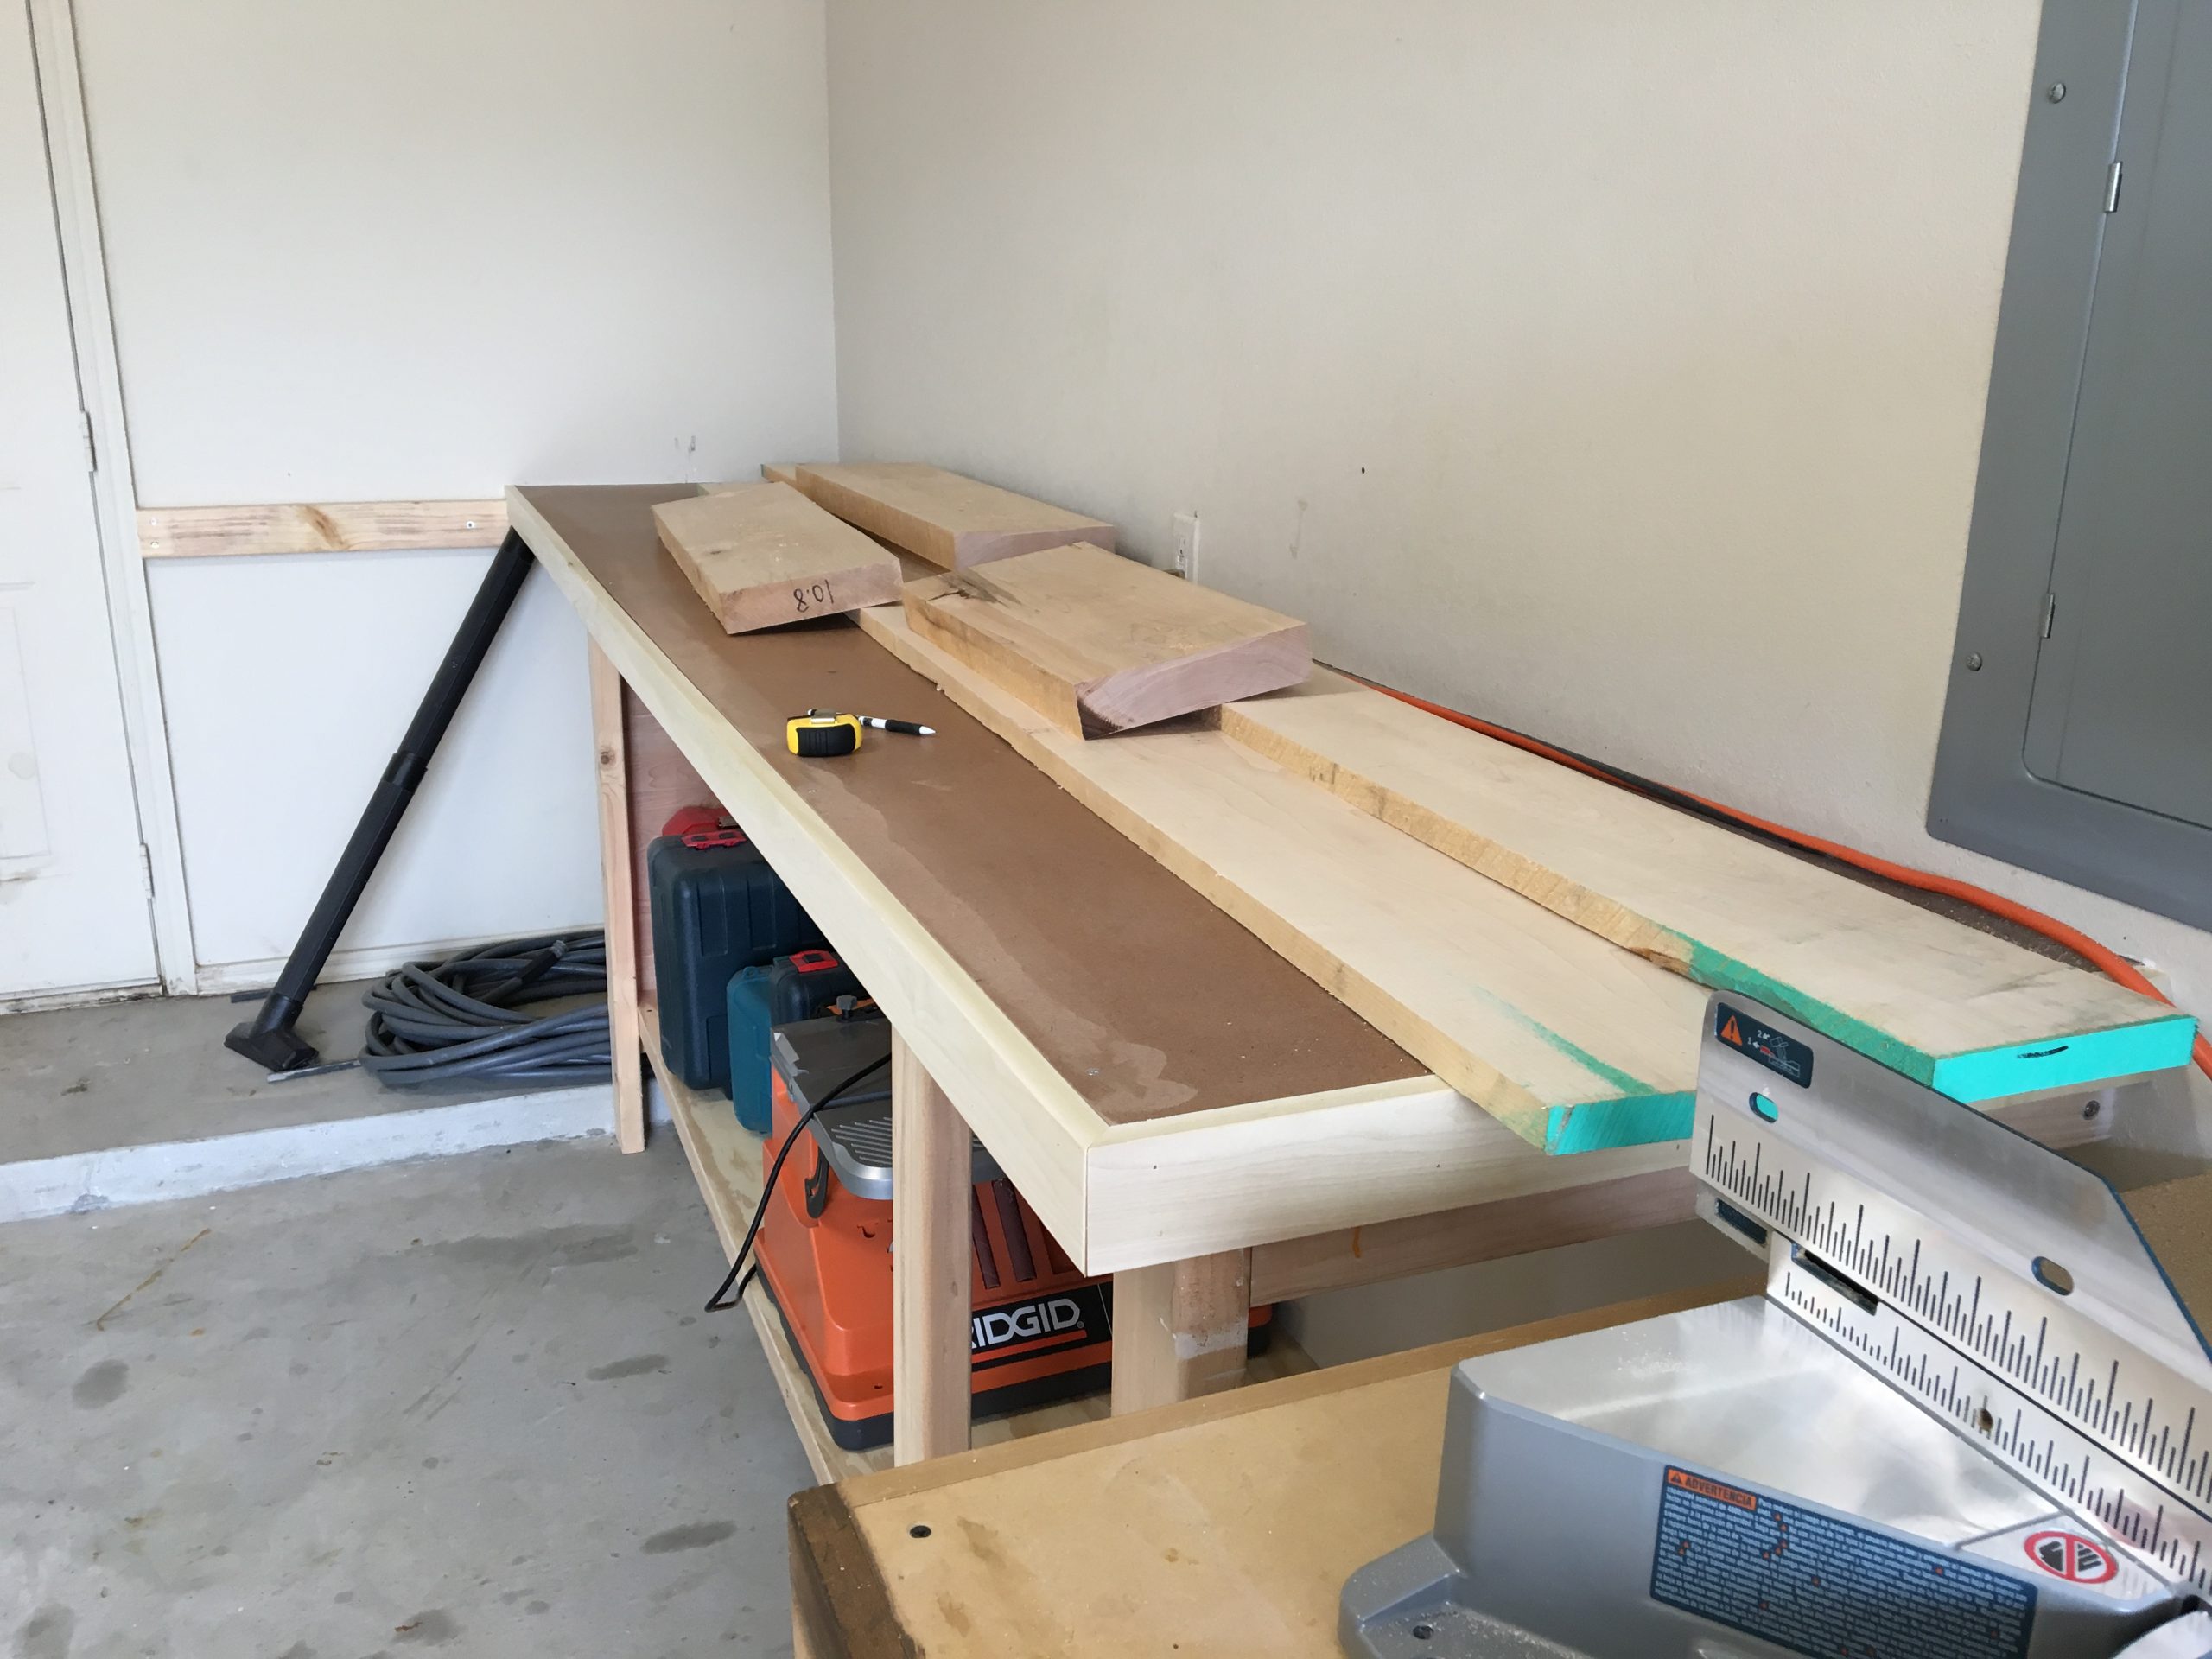
Buying the wood
After a visit to WoodCraft, I decided I would build it out of maple, a nice, clean, light, hardwood.
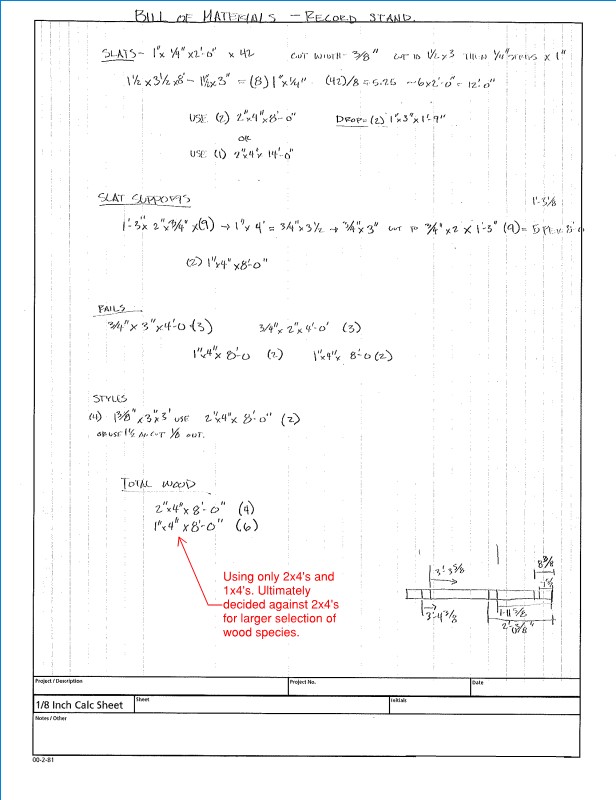
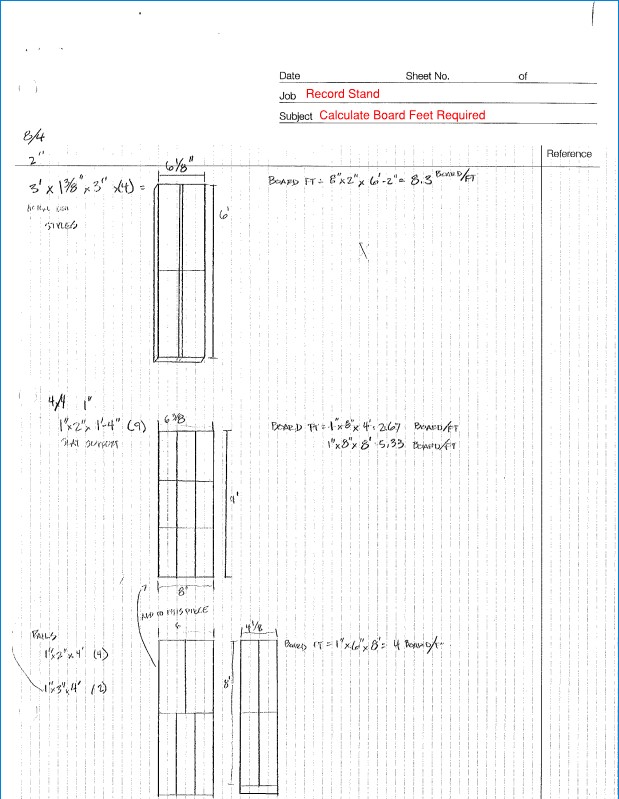
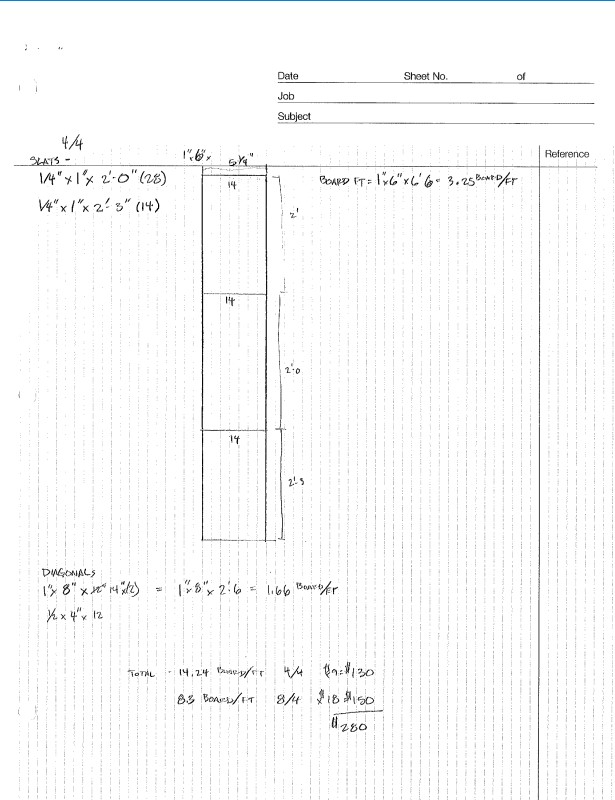
“But how much do I buy?” I wondered. “And everything is in board feet? What are board feet?”
Well board feet is the volumetric measurement used in buying dimensional lumber. 1 board foot is a piece of wood, 1 foot x 1 foot x 1 inch.
More numbers, I love numbers, I got this no problem!
Once I had the lumber, then came the fun part- time to cut and build.
Buying wood in dimensional lumber (Know your Board feet!)
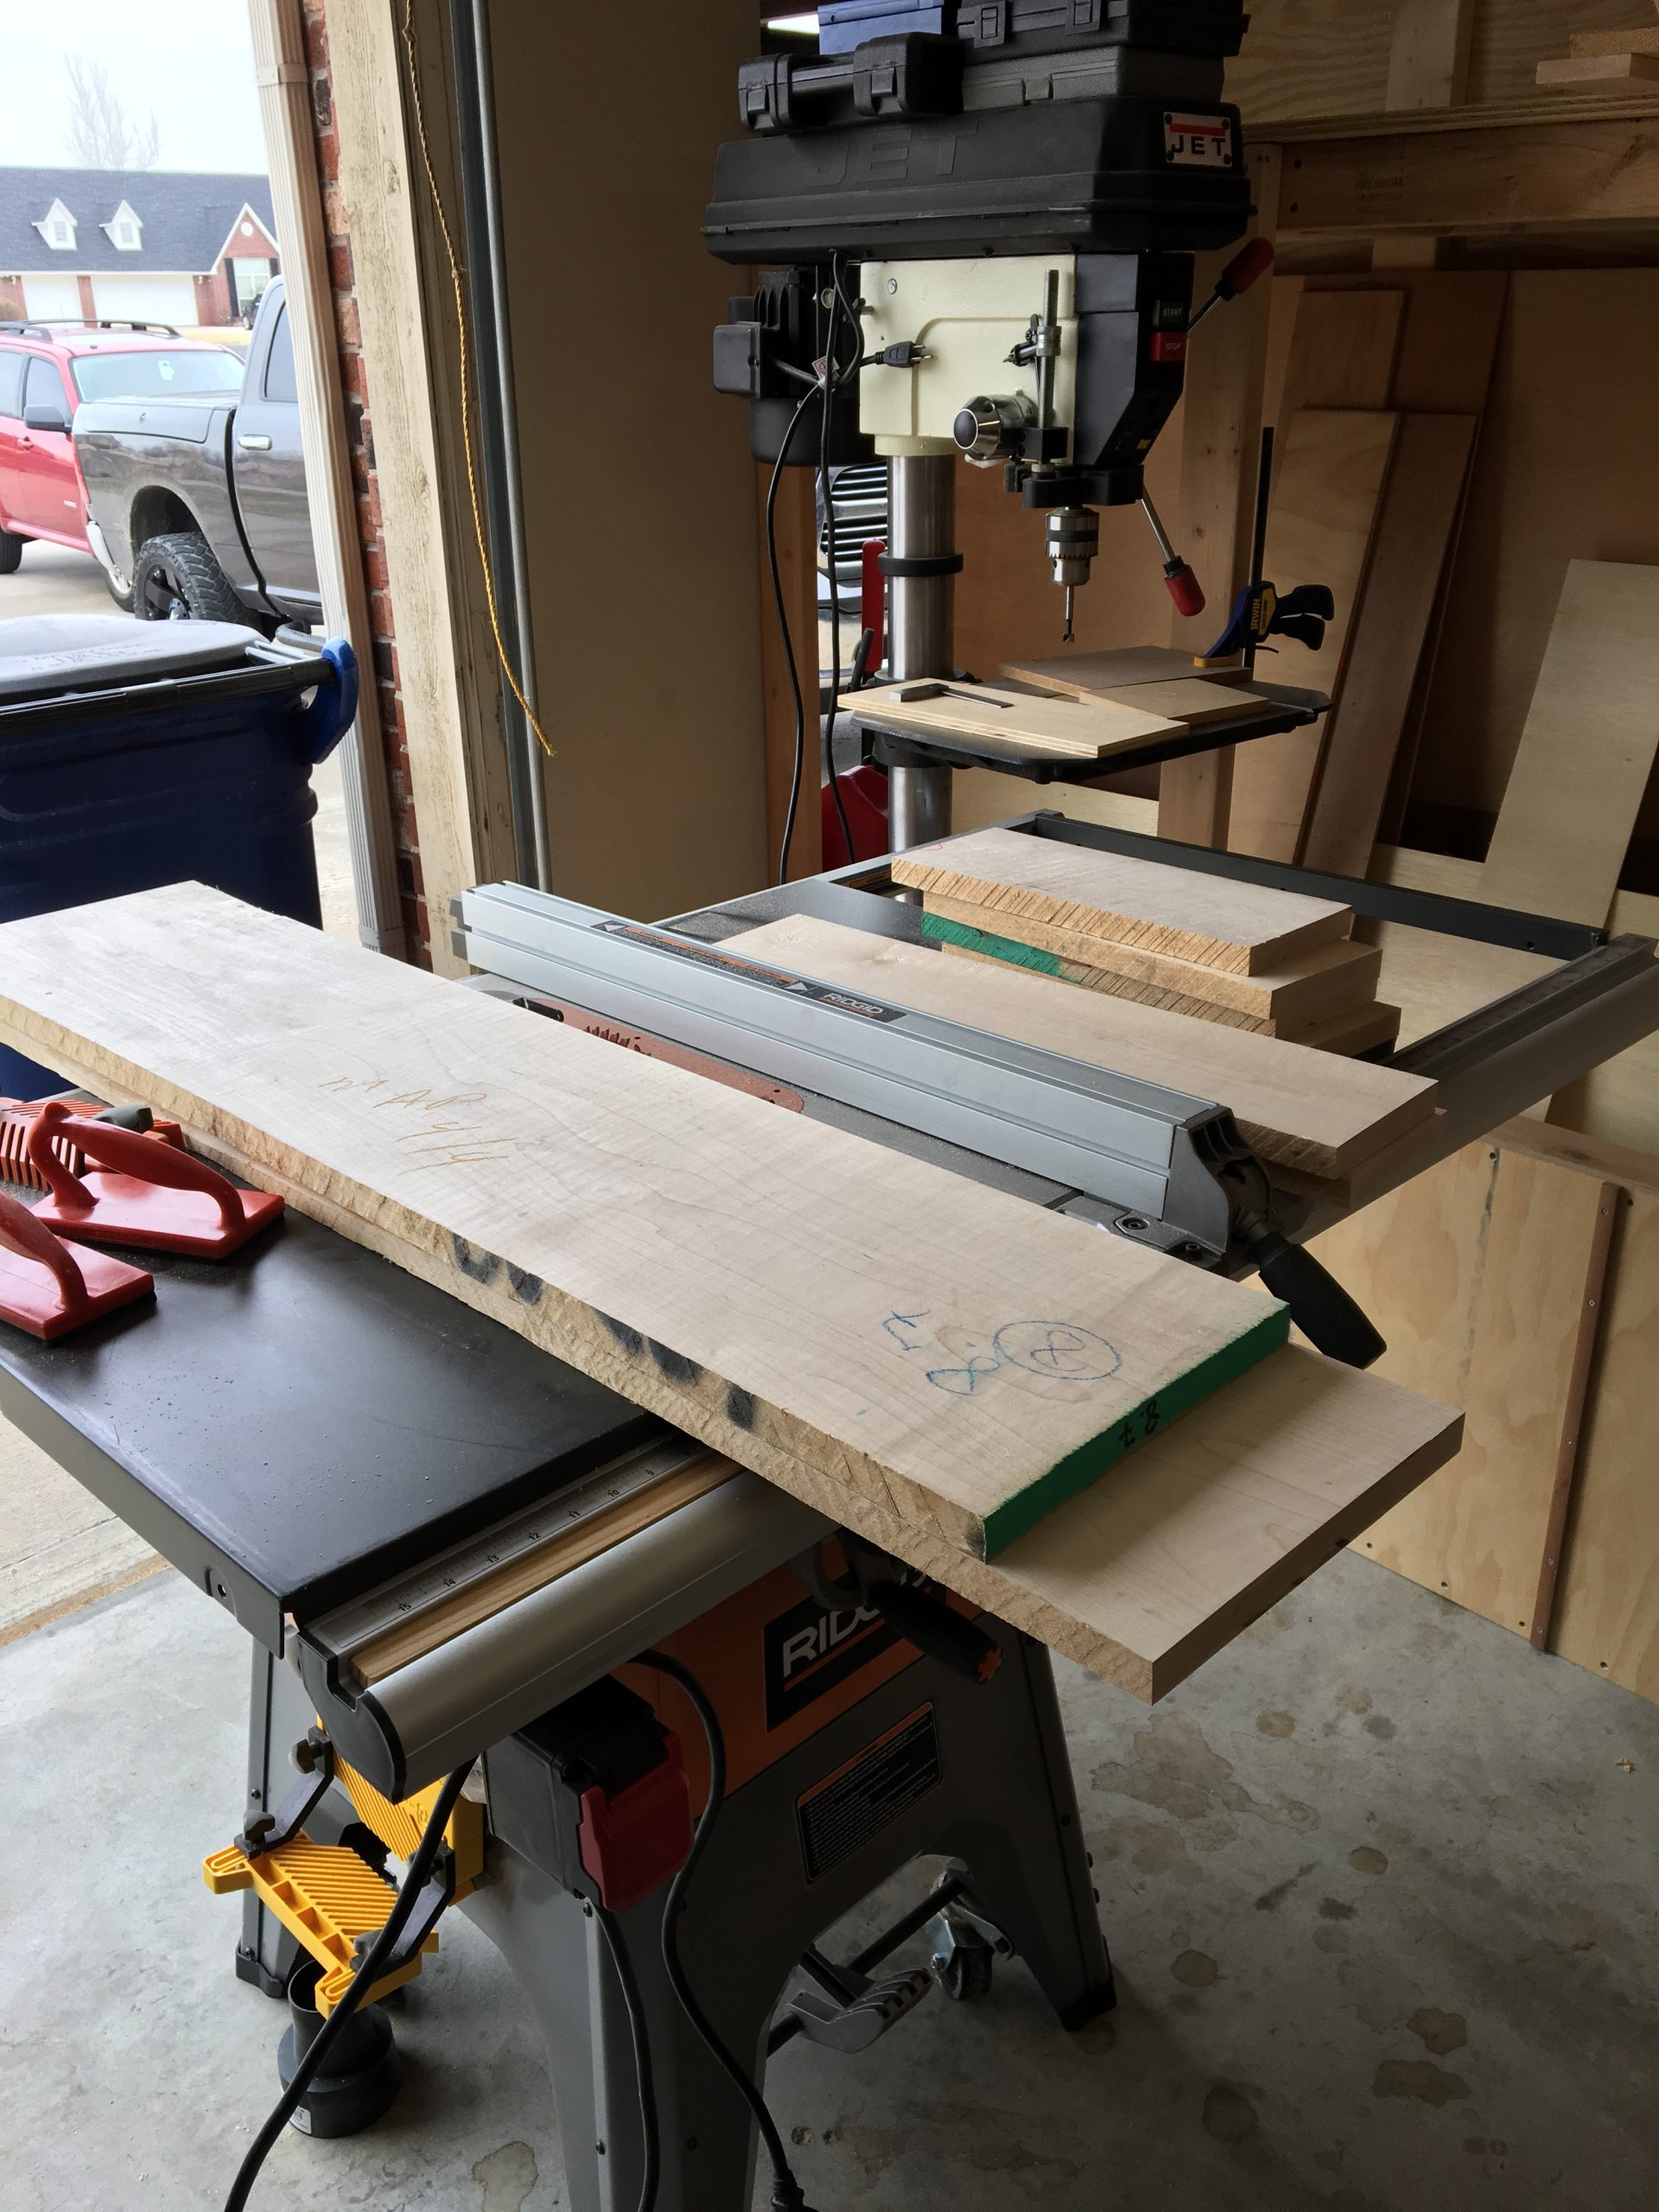
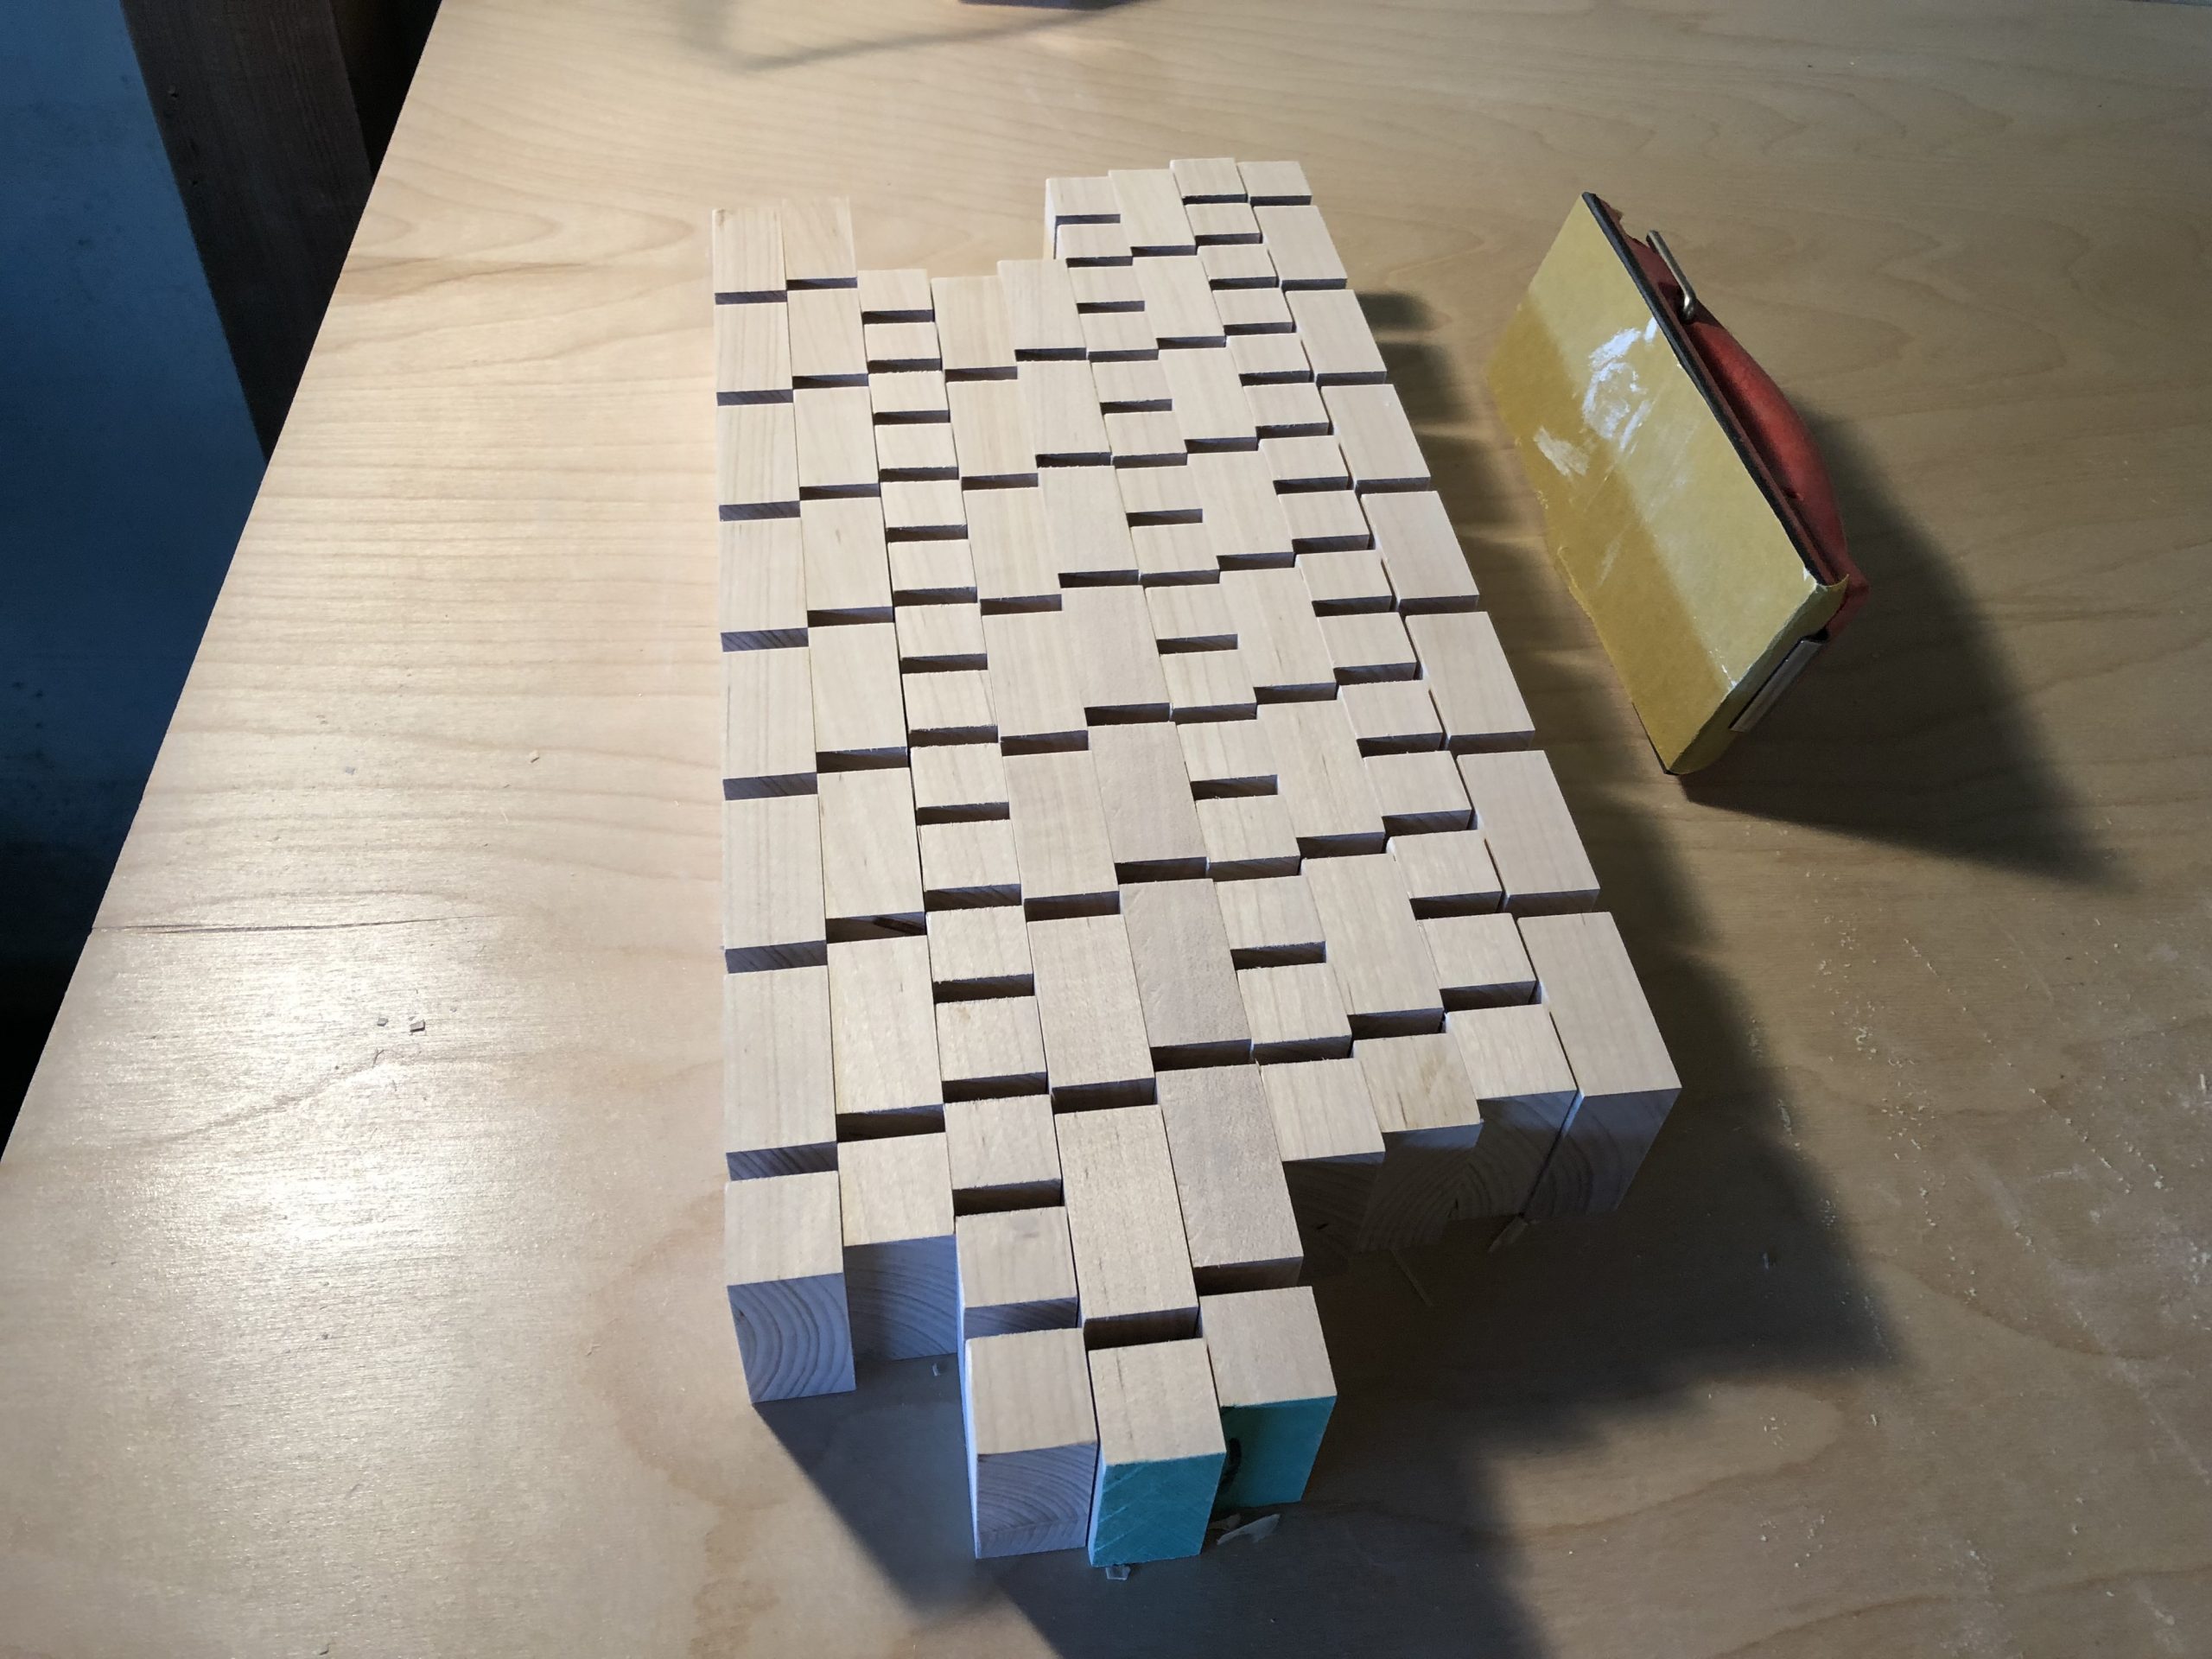
Starting the cuts
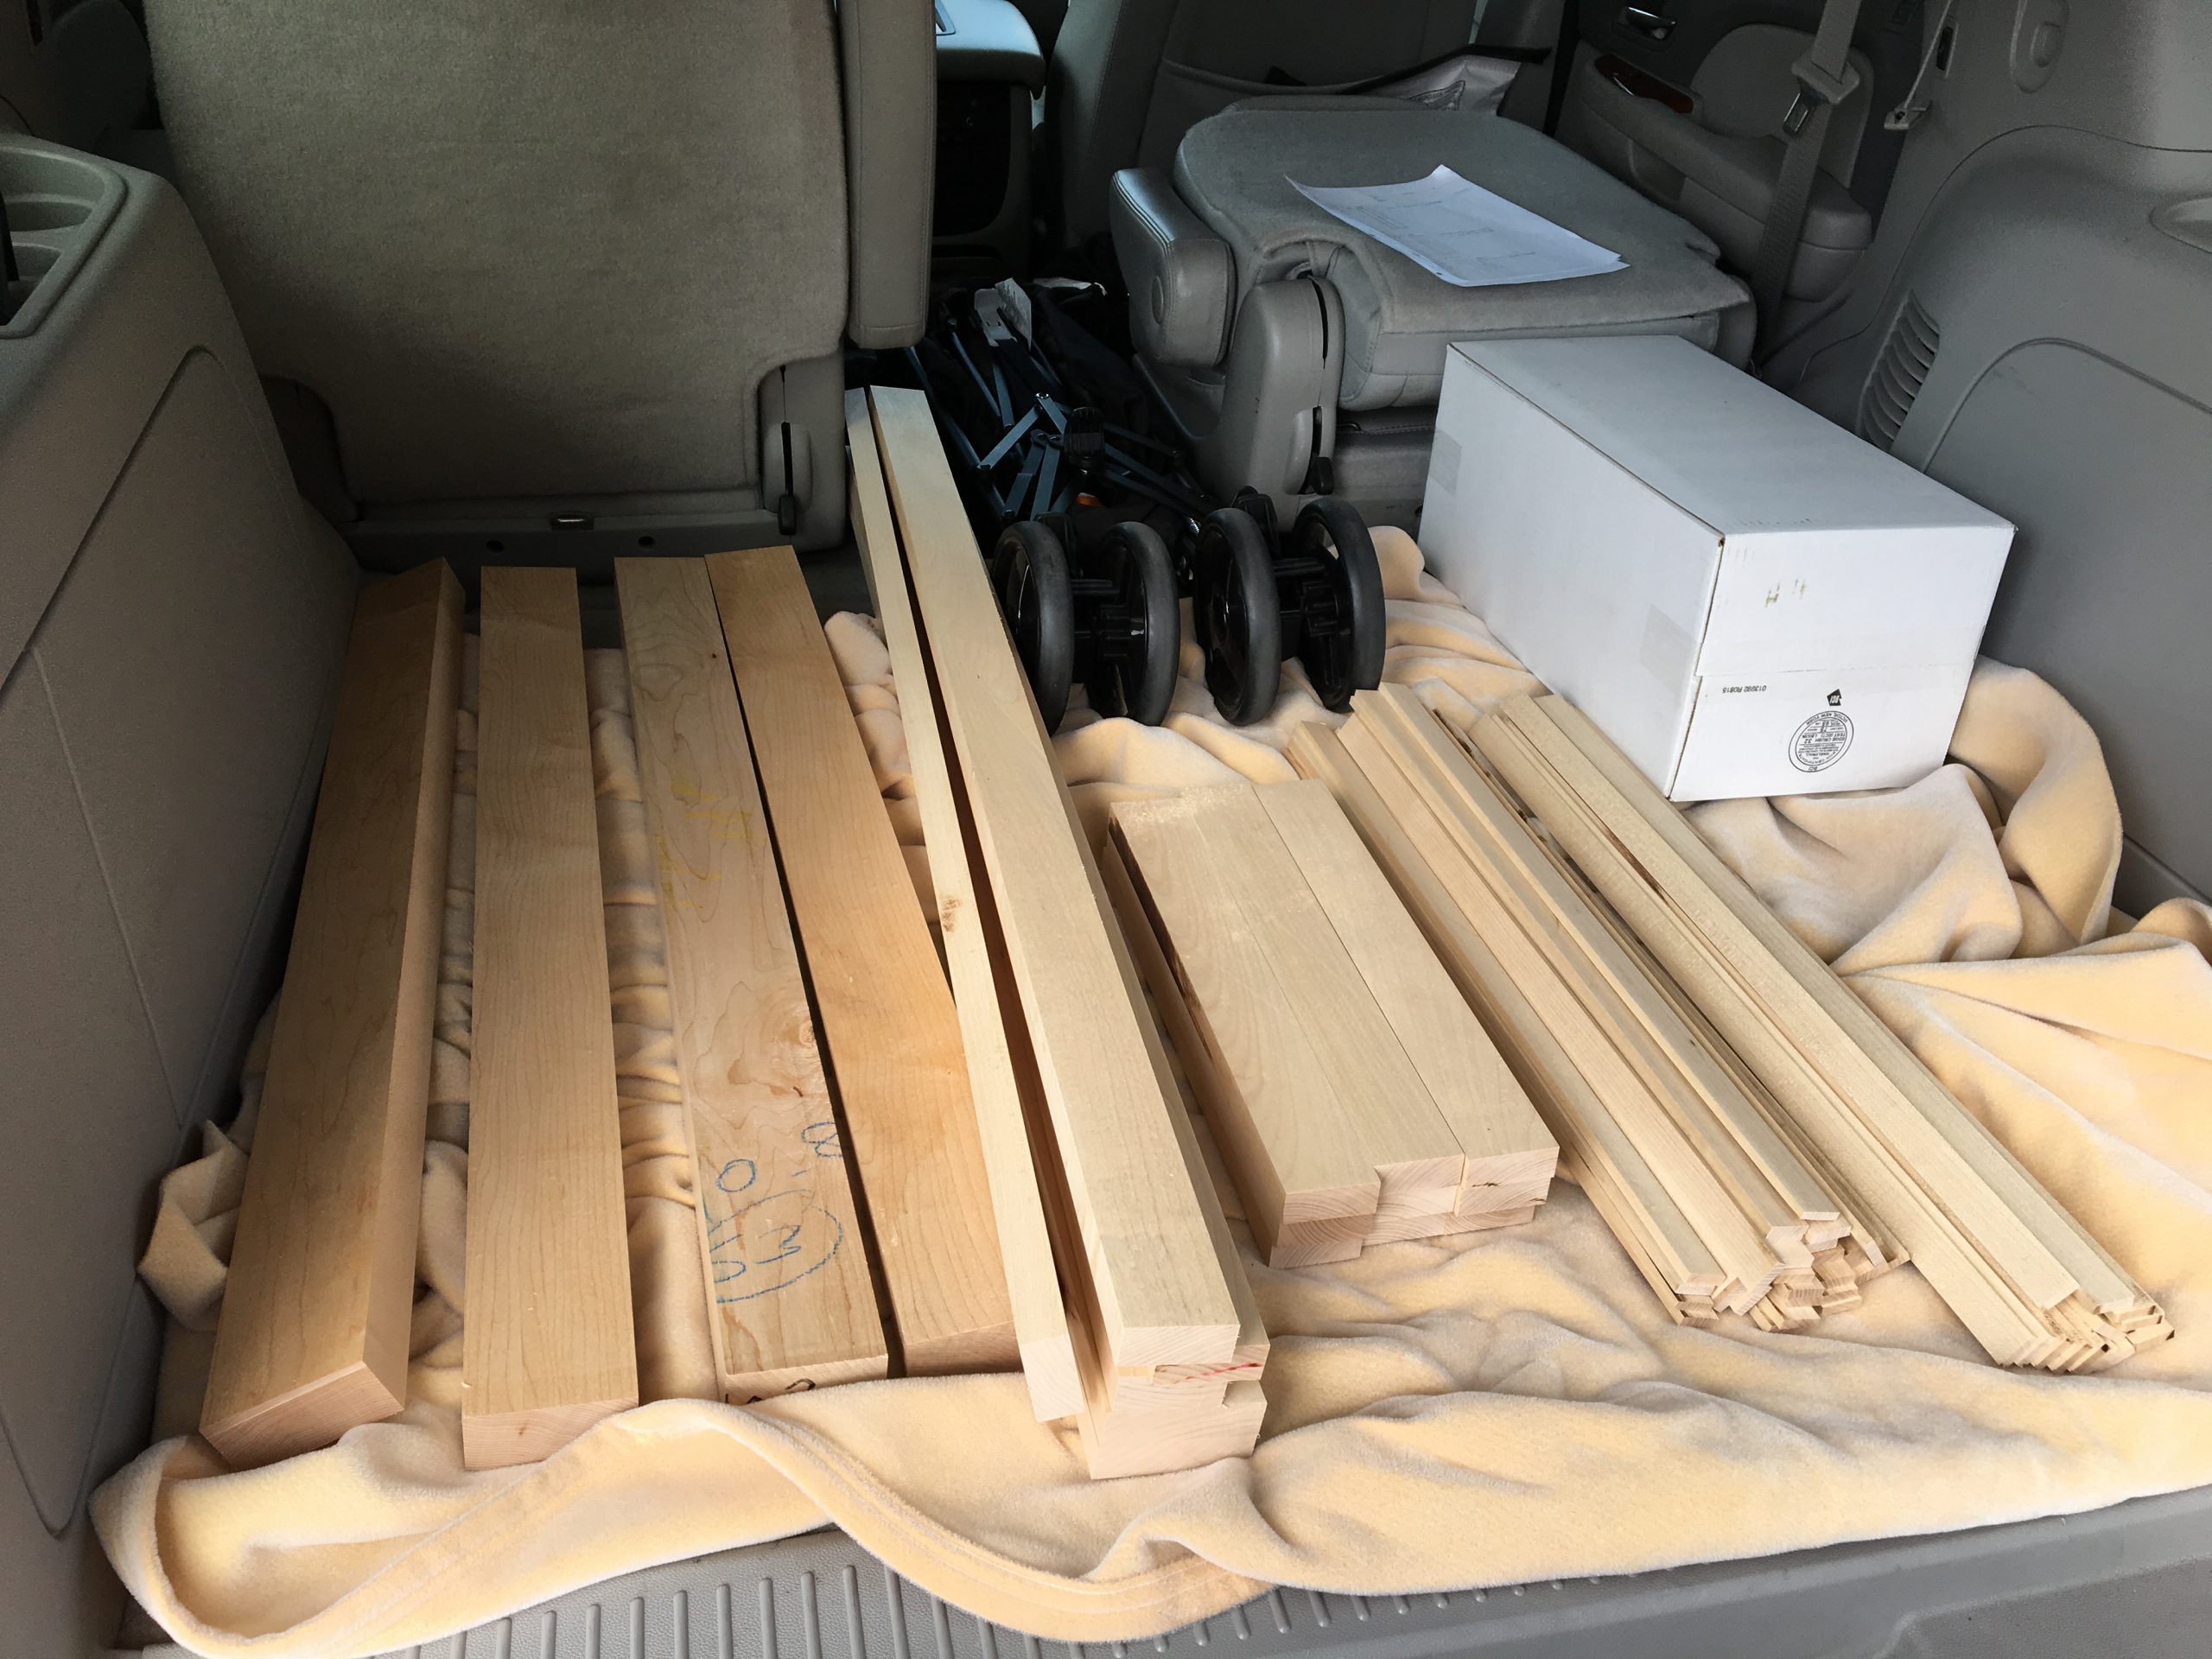
Finished with bulk cuts
Cutting slat seats – Shout out to Jason Arnes (Pictured here) and his amazing wood shop set-up for helping me get the dimensional lumber, squared and cut down.
Finished cutting slat seats
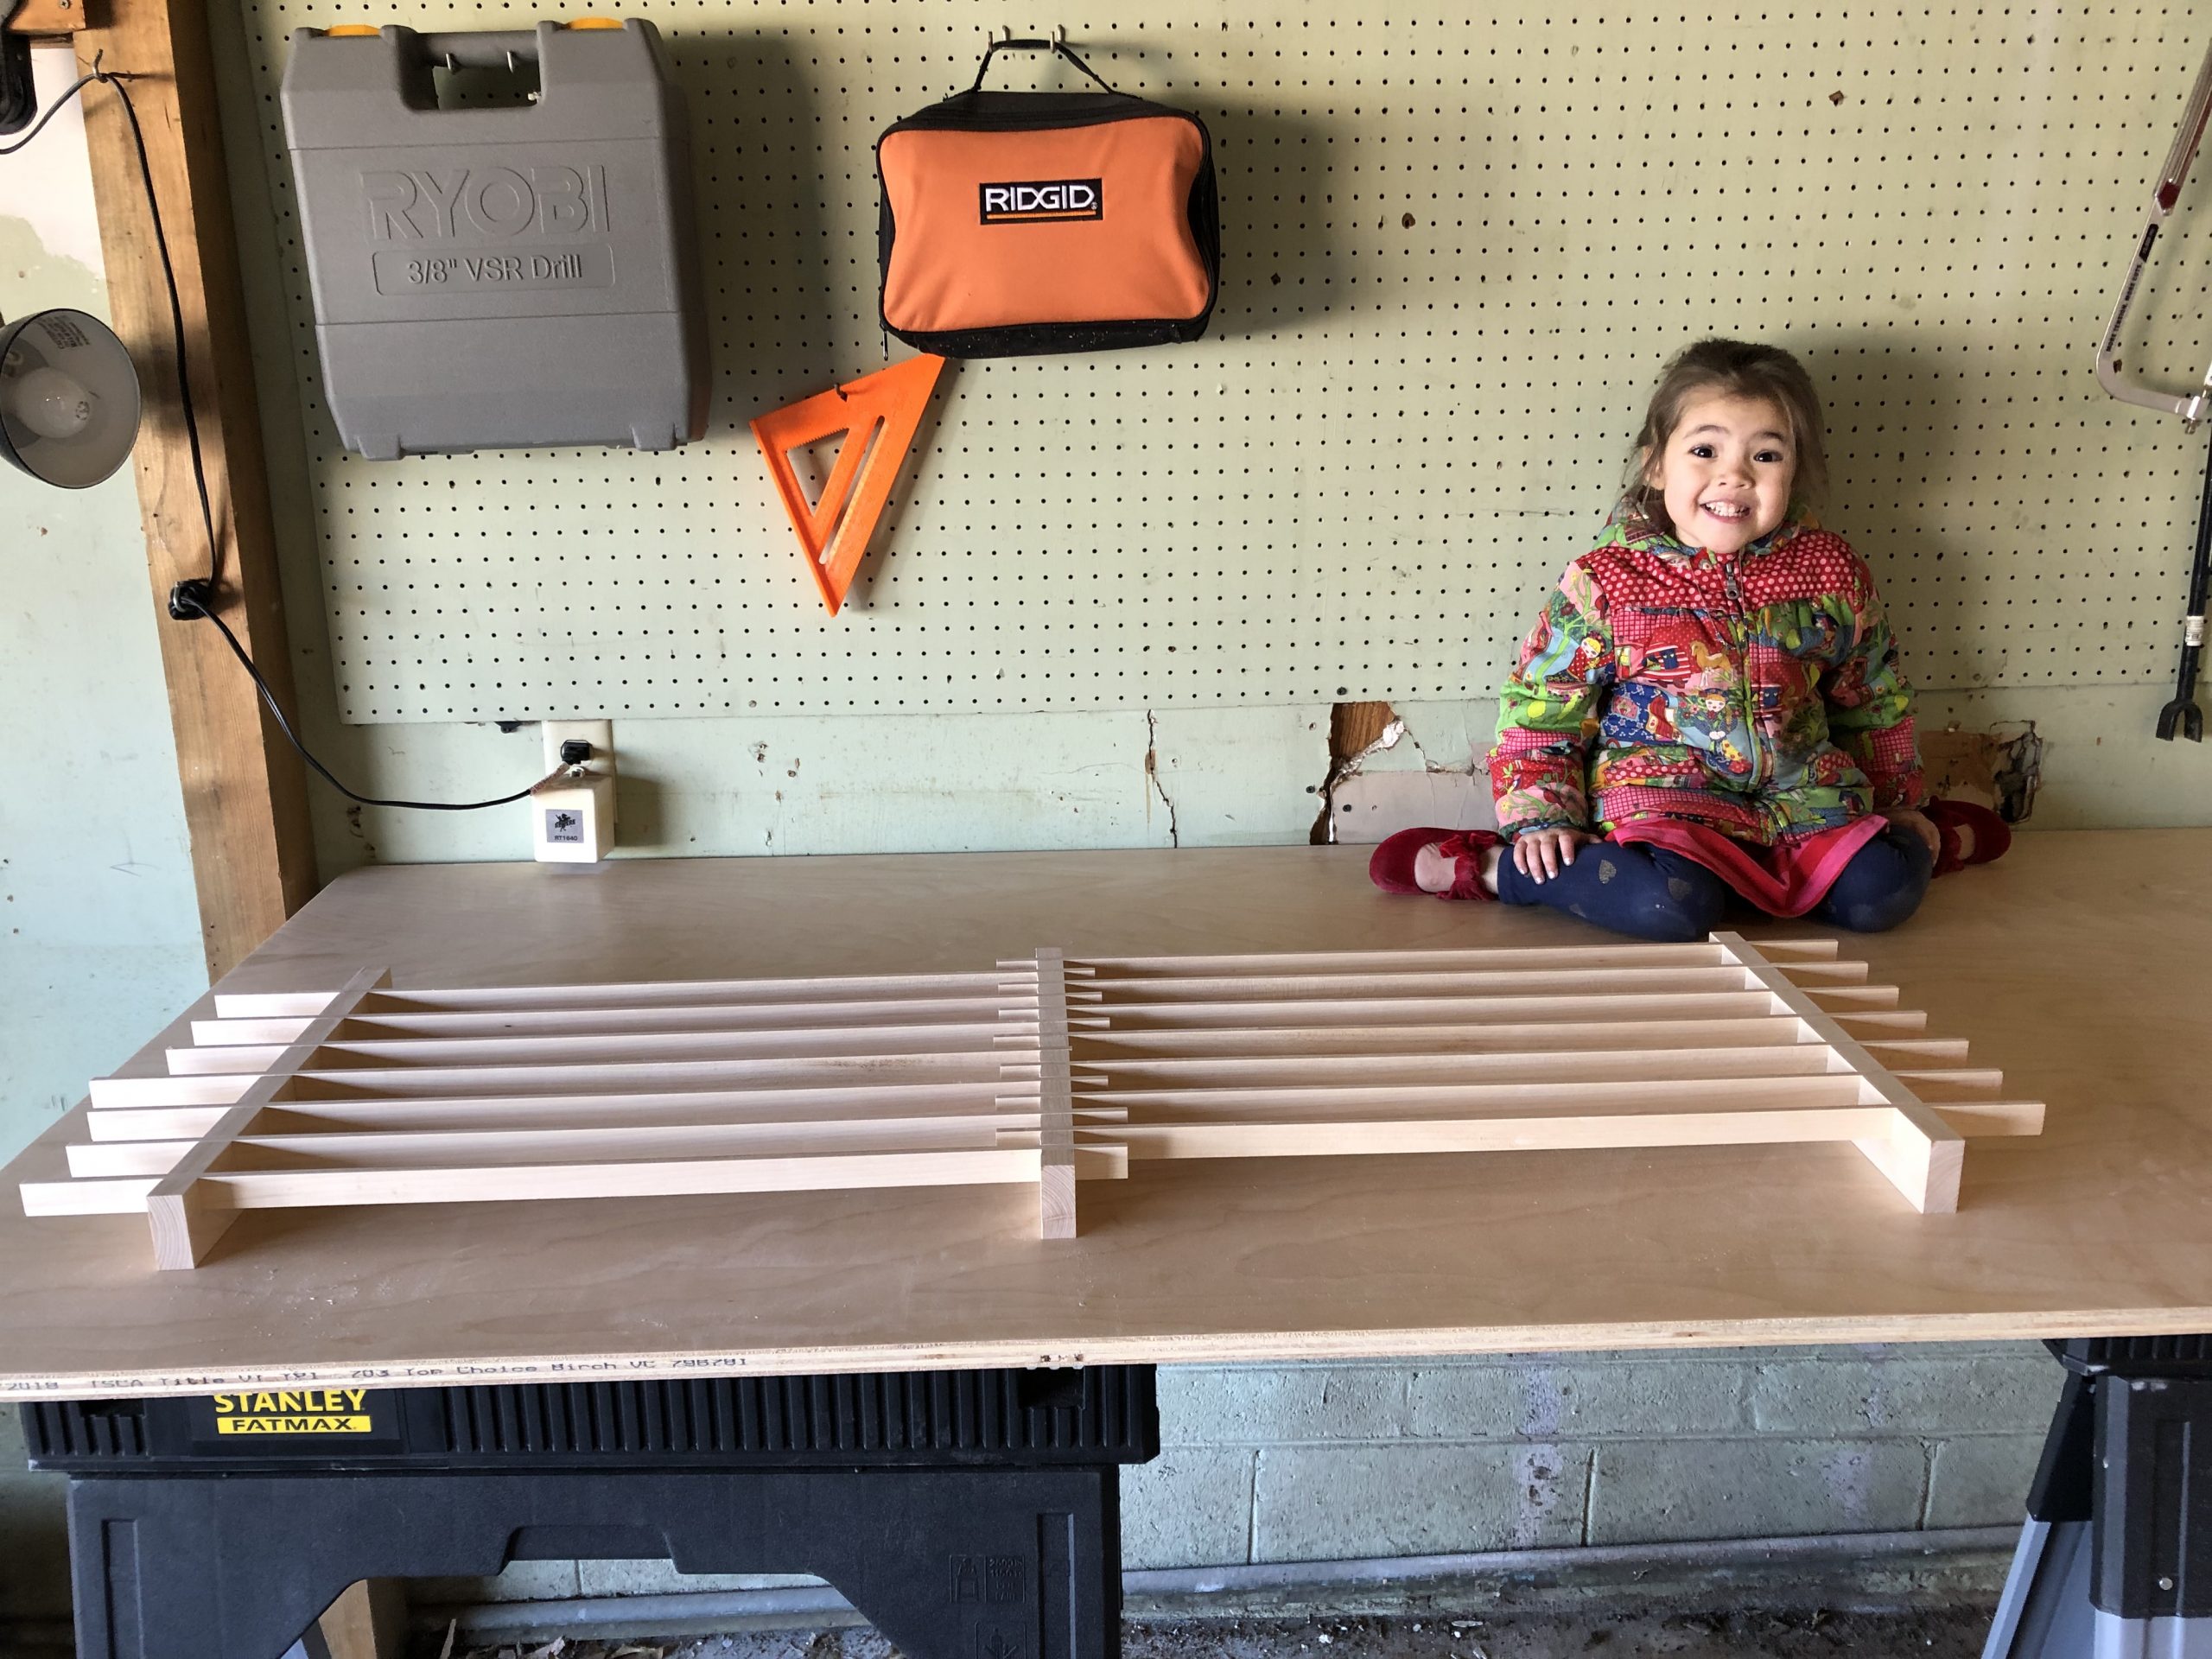
Building the shelves with my assistant
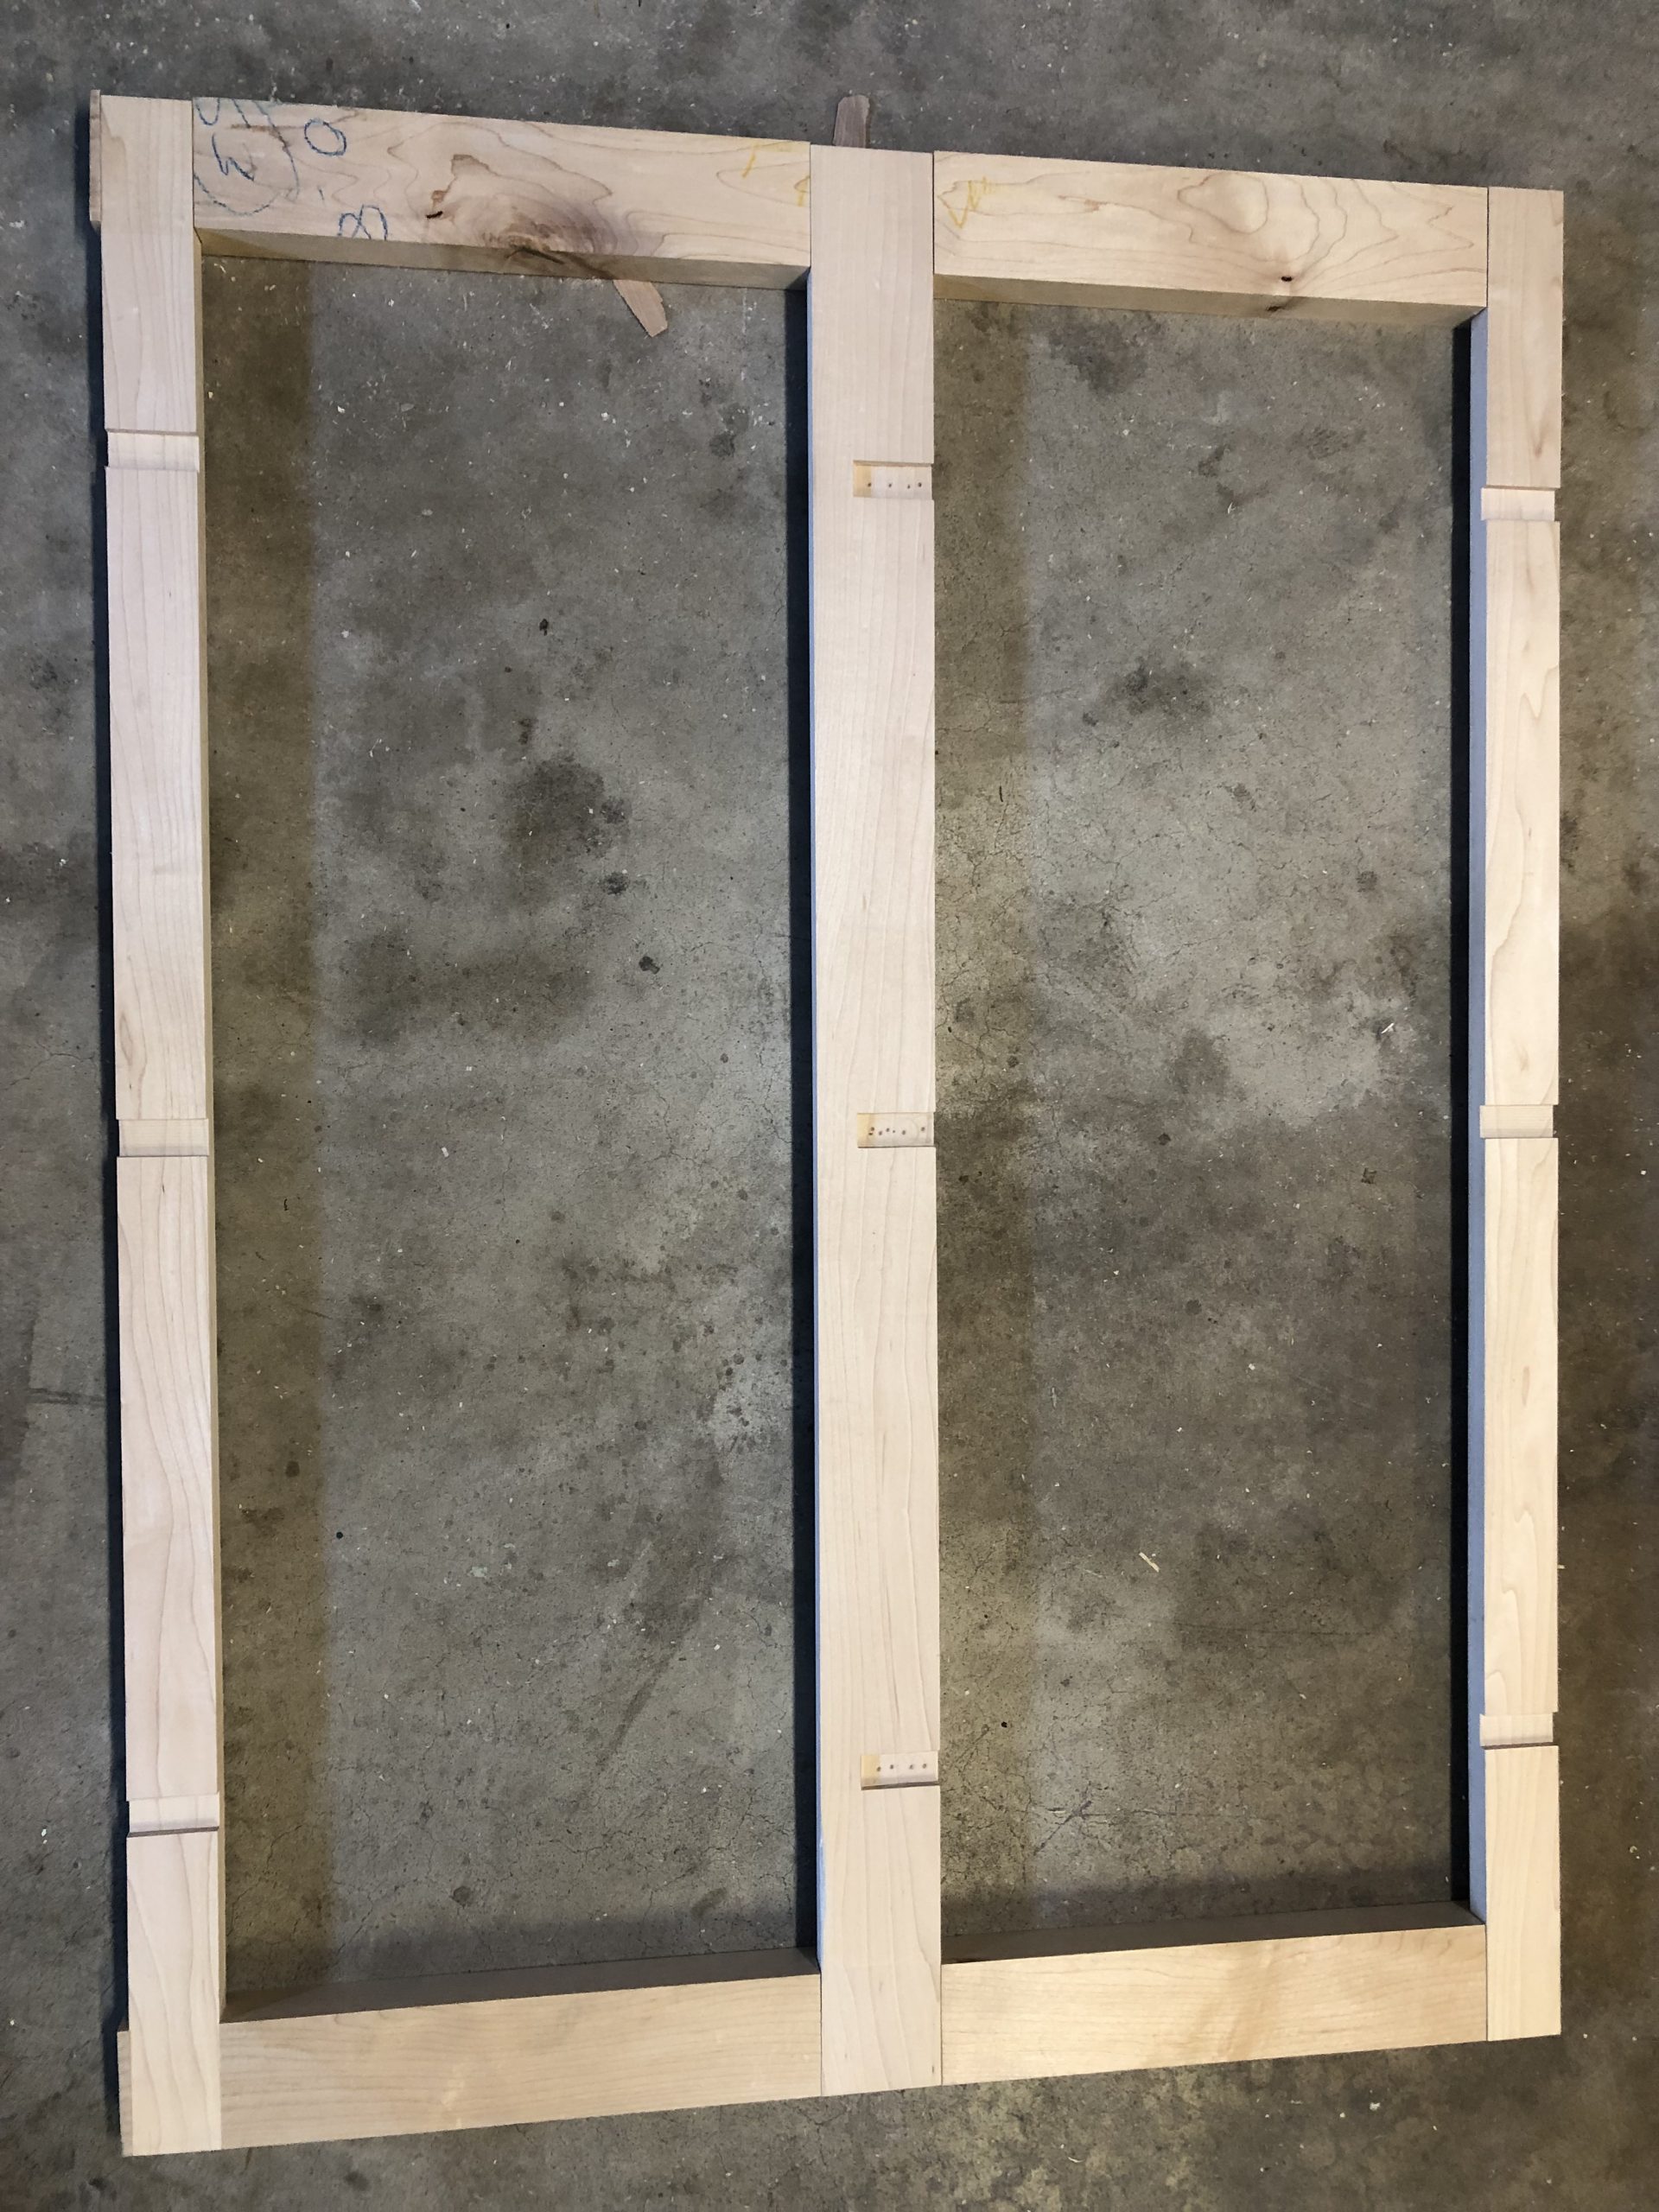
Fitting the face frame
Working on the dry fit up
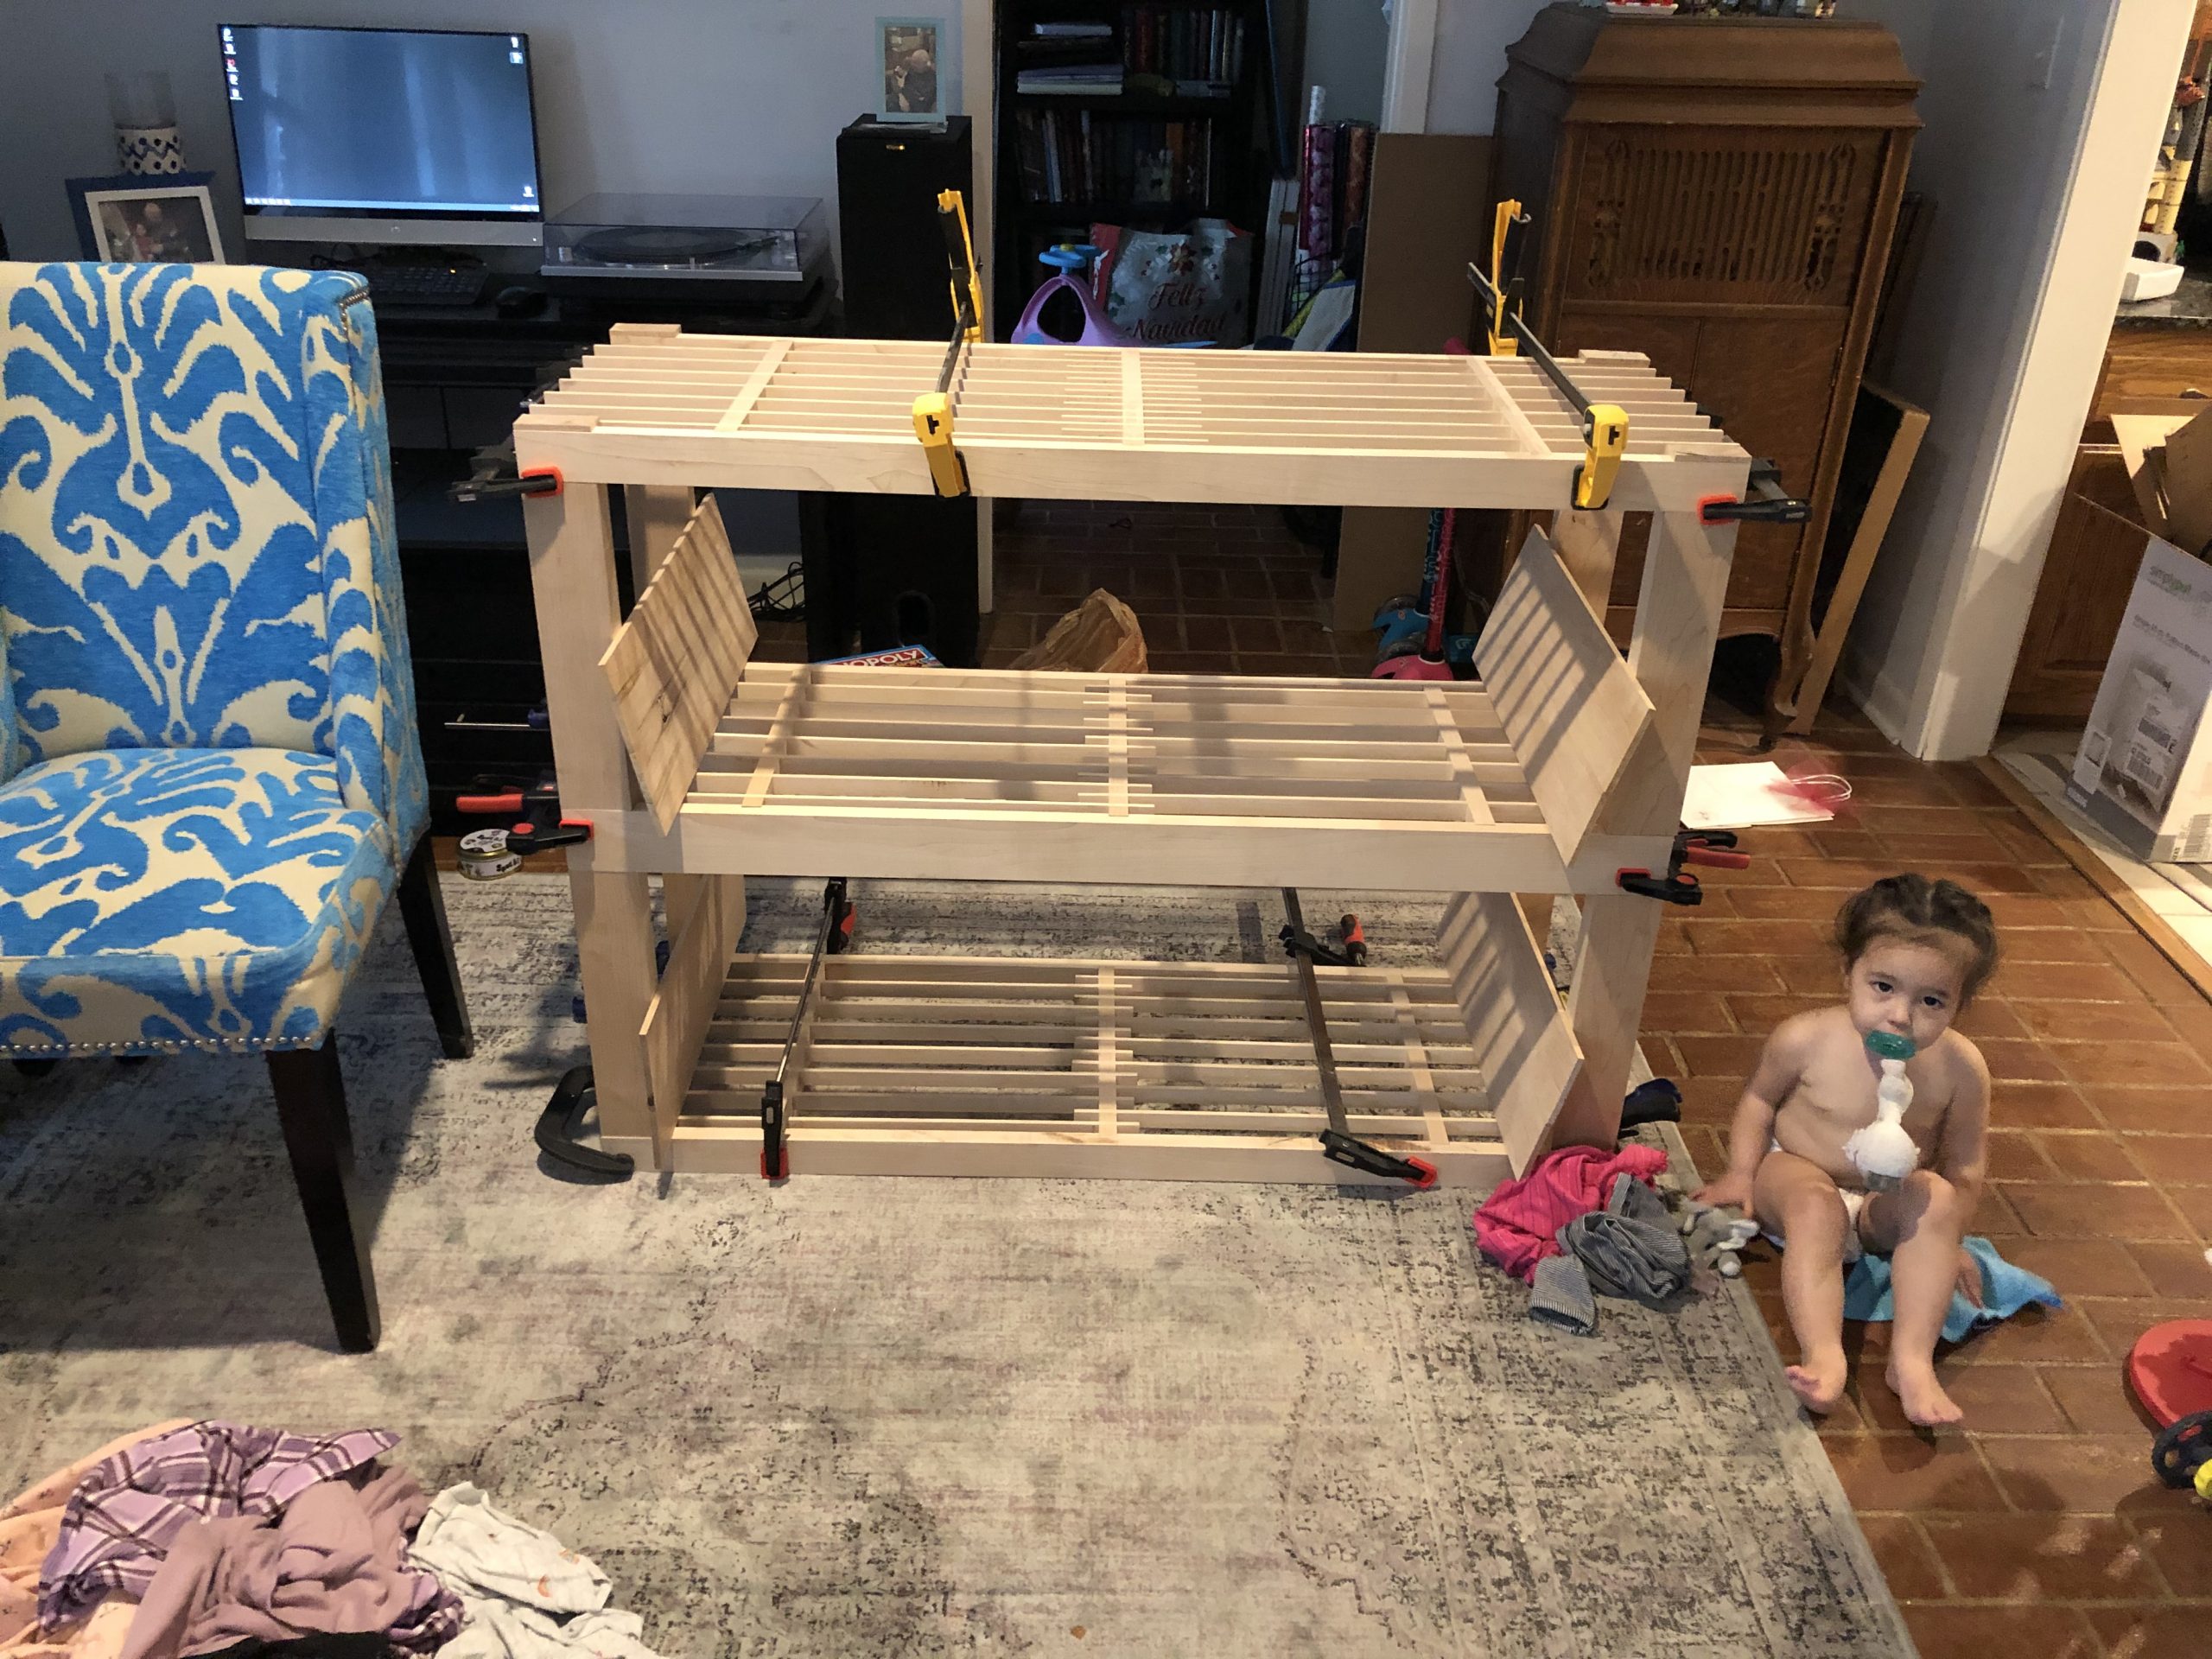
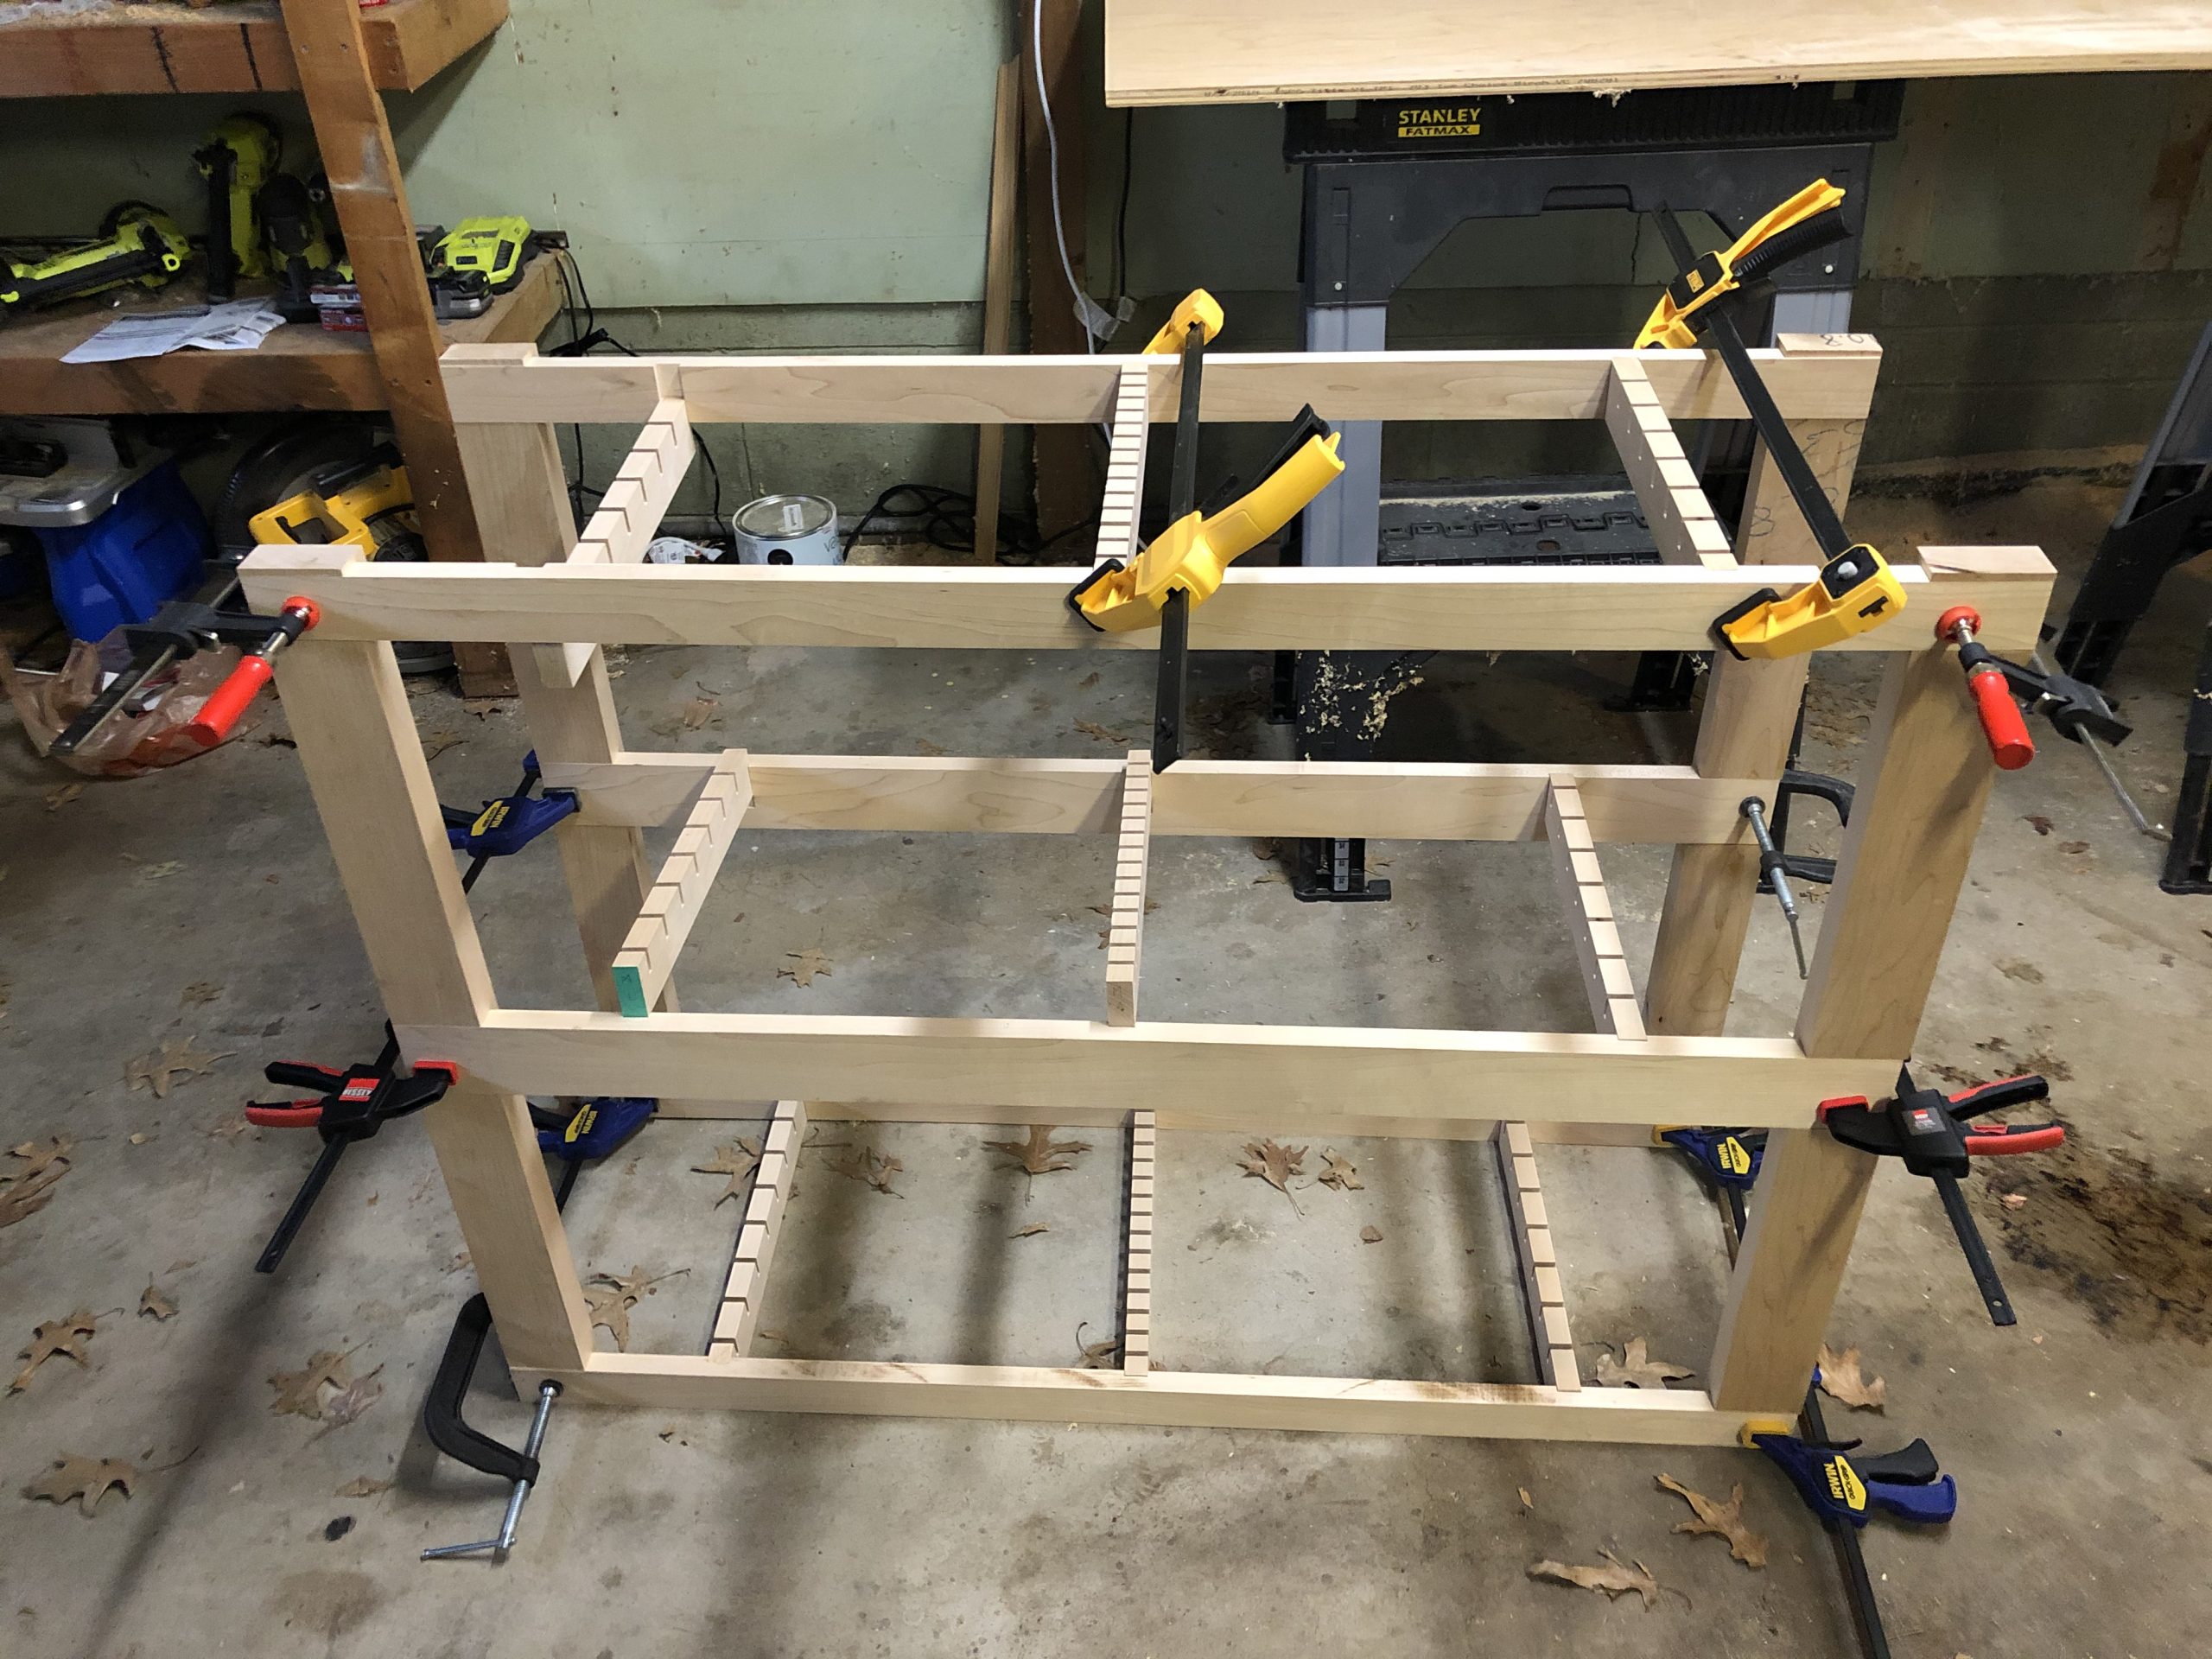
Finished the dry fit up with my second assistant
Like any worthwhile project, it is taking time. I would rather not say exactly how much time. But I will admit, when the design process started, I didn’t have either of my two lovely assistants. I have very much enjoyed this build as it allows me to do all the phases of construction: design, calcs, and construction. I don’t get to wear the design and construction hats as much at the day job, so these little DIY projects offer fun insights into the process as a whole.
The next step is to apply the finish coat and glue it all together. Simple, right!
As engineers, we sometimes DIY a little differently - with spreadsheets, calcs, and models. Did you enjoy this week’s DIY project? Check back for more Wallace Engineer DIY’s in future posts!
Associate
Kyle received both his Bachelor of Science in Architectural Engineering and Master of Science in Civil Engineering-Structural Emphasis from the University of Oklahoma. He is…
View Profile
Structural Engineer
Mr. Haskett has over 11 years of experience in the field of structural engineering. Kyle’s project experience includes retail expansion, reuse, and remodels. His special skills include new construction, expansion of existing structures, seismic design and retrofit, and design of large and small retail structures.

Are you passionate about the AEC industry? Do you want to use your talents with a group of the greatest engineers, landscape architects, technicians and support personnel in the industry? You've found the right place. Wallace is unique in the way we strive to make lives better for our clients, communities and employees. And we believe we have more fun doing our job than just about anyone else! The art of possibility. Discover it at Wallace.
Learn More
There are no comments.