Normally, new homeowners get indoctrinated into the cult of "homeownership" with the standard DIY projects: painting, caulking, building IKEA bookshelves, etc.
Unless the new homeowners are both structural engineers...then, their idea of a "standard" DIY project might be a little different.
I mean, why kick off homeownership by testing your marriage with an IKEA bookshelf when you can do something easy like design and pour your own concrete footing for your new above-ground storm shelter?
Background
My husband, Trevor, and I met while tying rebar cages and pouring concrete for grad school research projects in 2011 at Missouri S&T. Shortly after graduation, we both moved to Oklahoma, where we soon discovered that despite the abundance of severe weather, there's a surprising lack of basements in which to take shelter. So when we got married and bought our first home in Oklahoma City in 2017, we agreed our first home improvement should be to install a storm shelter - but what type?
He was on board with a below-ground shelter based on its space-saving and cost efficient nature. I advocated for an above-ground shelter, mostly due to accessibility and a little bit due to my irrational fears of spiders and drowning. In the end, (in true newly-married fashion) he "compromised"...and agreed to the above-ground.
Why DIY our own storm shelter footing?
Pre-fab storm shelters are designed and tested per ICC 500 (ever heard of the infamous 15 lb 2x4 at 100 mph?). But when it comes to anchorage of above-ground shelters, ICC 500 is pretty hands-off. Section 307 of the current ICC 500 simply states that “anchorage to concrete foundation systems shall be in accordance with ACI 318.” Basically, it’s up to the engineer to make sure that whatever anchorage they specify can transfer the loads to an adequate foundation (or slab) per standard code requirements.
So I was curious. What kind of anchors were these companies specifying to be installed in a thin concrete slab to resist the crazy uplift and shear forces caused by tornadoes?
As it turns out, everything from wedge anchors to epoxy anchors to screw anchors with diameters from ⅜” all the way up to ⅞”. Literally every company had something different.
Some of these specified anchors left us perplexed. Long story short, larger diameter anchors need increased embedment to develop capacity. As a result, a lot of the standard anchors being specified were longer than a typical 3-4 inch thick garage slab. They would end up being installed completely through the slab.
"So what?" you say. Well, it's a condition that's not necessarily consistent with the anchor manufacturer’s assumptions for installation, which means their specified capacities would no longer be valid. That's not to say an engineer couldn’t calculate a capacity based on general concrete theory and some assumptions. It's just not as clear-cut without manufacturer-tested and approved capacities for this "through-slab" condition.
Plus, anchoring through a slab leaves the back ends of the anchors potentially exposed to moisture or corrosive soil on the underside of your slab. During a tornado, the last thing you want to be worrying about is whether your storm shelter anchors have corroded or deteriorated!
There has never been a case of a shelter blowing away, but there were just too many unknowns and assumptions for us. We decided the best path forward would be to remove a portion of our 3.5 inch unreinforced garage slab and design and install our own reinforced concrete footing with fully embedded anchorage
Footing and Anchorage Design
The first step involved sizing a footing to resist uplift and overturning forces per ICC 500. I used an Excel spreadsheet to calculate ASCE 7-10 wind pressures on our 4 foot square steel box from 250 mph winds. Next, I analyzed combinations of uplift and horizontal wind loads to determine the worst case moment, shear, and uplift on the footing and anchors. Then, I developed my own spreadsheets - one to evaluate uplift, bearing pressure, overturning, and concrete design per ACI 318 and one to design anchorage based on manufacturer values. Based on the calcs, we landed on a 6’-0” x 6’-0” x 1’-2” footing with ⅝" drilled and epoxied anchors with at least 6" embedment.
Footing and Anchorage Installation
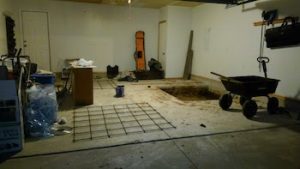
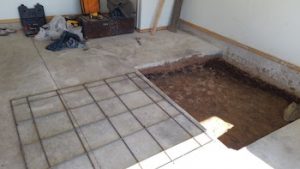
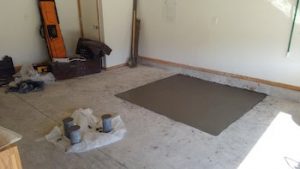
First, we had to sawcut out a portion of our garage slab and excavate the pit for our new foundation. I say “we," but really all the credit goes to my husband. One quick concrete saw rental later, he had removed the section of slab and was on to digging. Hand digging hard, Oklahoma clay is no easy task, but he shoveled out all 33 cubic feet!
While he finished cleaning out and compacting the excavation, I figured out where reinforcement needed to go to avoid the anchors. I then tied two mats of #4 bars at 6"-12" o.c. to be placed at the top and bottom of the foundation.
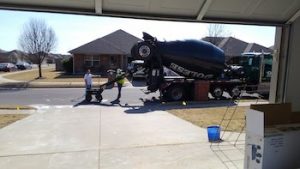
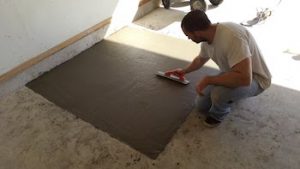
Concrete pour day was nothing new to us, but I think our truck driver was a little surprised to show up and find our unorthodox DIY duo. We had determined that the most feasible way to get the concrete from the truck to our footing was to dump loads into our buggy and have Trevor ferry it up our sloped driveway to the pit. While he hauled concrete, I shoveled around the loads and consolidated with a concrete vibrator.
It went surprisingly smoothly, and within a few minutes, we were topping it off, casting our 7 and 28 day strength cylinders (yes, we tested them - the final strength was around 5,000-6,000 psi!), and sending the truck on its way.
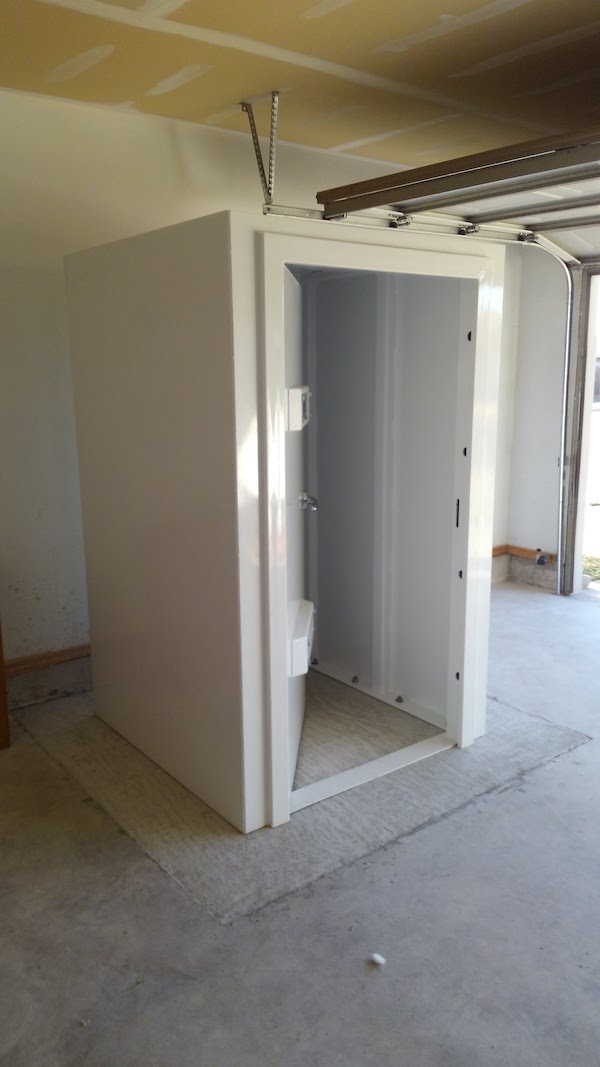
About a month later, the storm shelter company came out to install our shelter. Epoxy anchors have excellent capacity, provided they are installed correctly. Good thing we knew a structural engineer who could be on site to do continuous inspection of the installation!
Thankfully, we've only had to use it once or twice. But it's been a peace of mind to know it's there when we need it. And that it’s anchored to a solid footing designed and installed by us!


There are no comments.